09.28.11_Eggplant Parmesan Casserole


Our friends Laura and Meghan have had us over for dinner a few times and after seeing all of the delicious things I had made in August, Laura really wanted us to have her over for dinner. We finally found a day that worked and I decided to make this Eggplant Parmesan Casserole that was on my list of things to try. Whenever I have people over for dinner I always try to make something that I can do most, if not all, of the work beforehand so once the guests arrive, I'm not in the kitchen the entire time. This casserole seemed perfect because I could get everything ready, cover it and leave it in the fridge until it was time to put it in the oven.

After reading the recipe I decided to one and a half the recipe since they said it made a very small amount and I did not want to run out of food. The recipe took a little while just because you had to roast the eggplant for 35-45 minutes first, let it cool, and then make the casserole before baking it for about 50 minutes. This was another time when I wish I owned a mandolin. My slices of eggplants were uneven to say the least but they still turned out ok. If you do not have parchment paper I would recommend getting some. I used foil that I covered with oil but the eggplant still stuck some. Eggplant always gets so flimsy once it's roasted anyway flipping it halfway through was a little frustrating so if you can get the parchment paper it will probably make your life a lot easier.

While the eggplant was roasting I got everything else ready. I mixed the panko bread crumbs, Parmesan cheese, oil and S&P and set aside for later to top the casserole. I also mixed together the ricotta cheese, Parmesan cheese, egg yolks, and S&P. I ended up using a little more cheese (shock) then the recipe called for because in my opinion you can never have enough cheese. I then made the sauce by browning some garlic, adding a can of crushed tomatoes, and tossing in some fresh basil at the very end (easy homemade sauce ever).

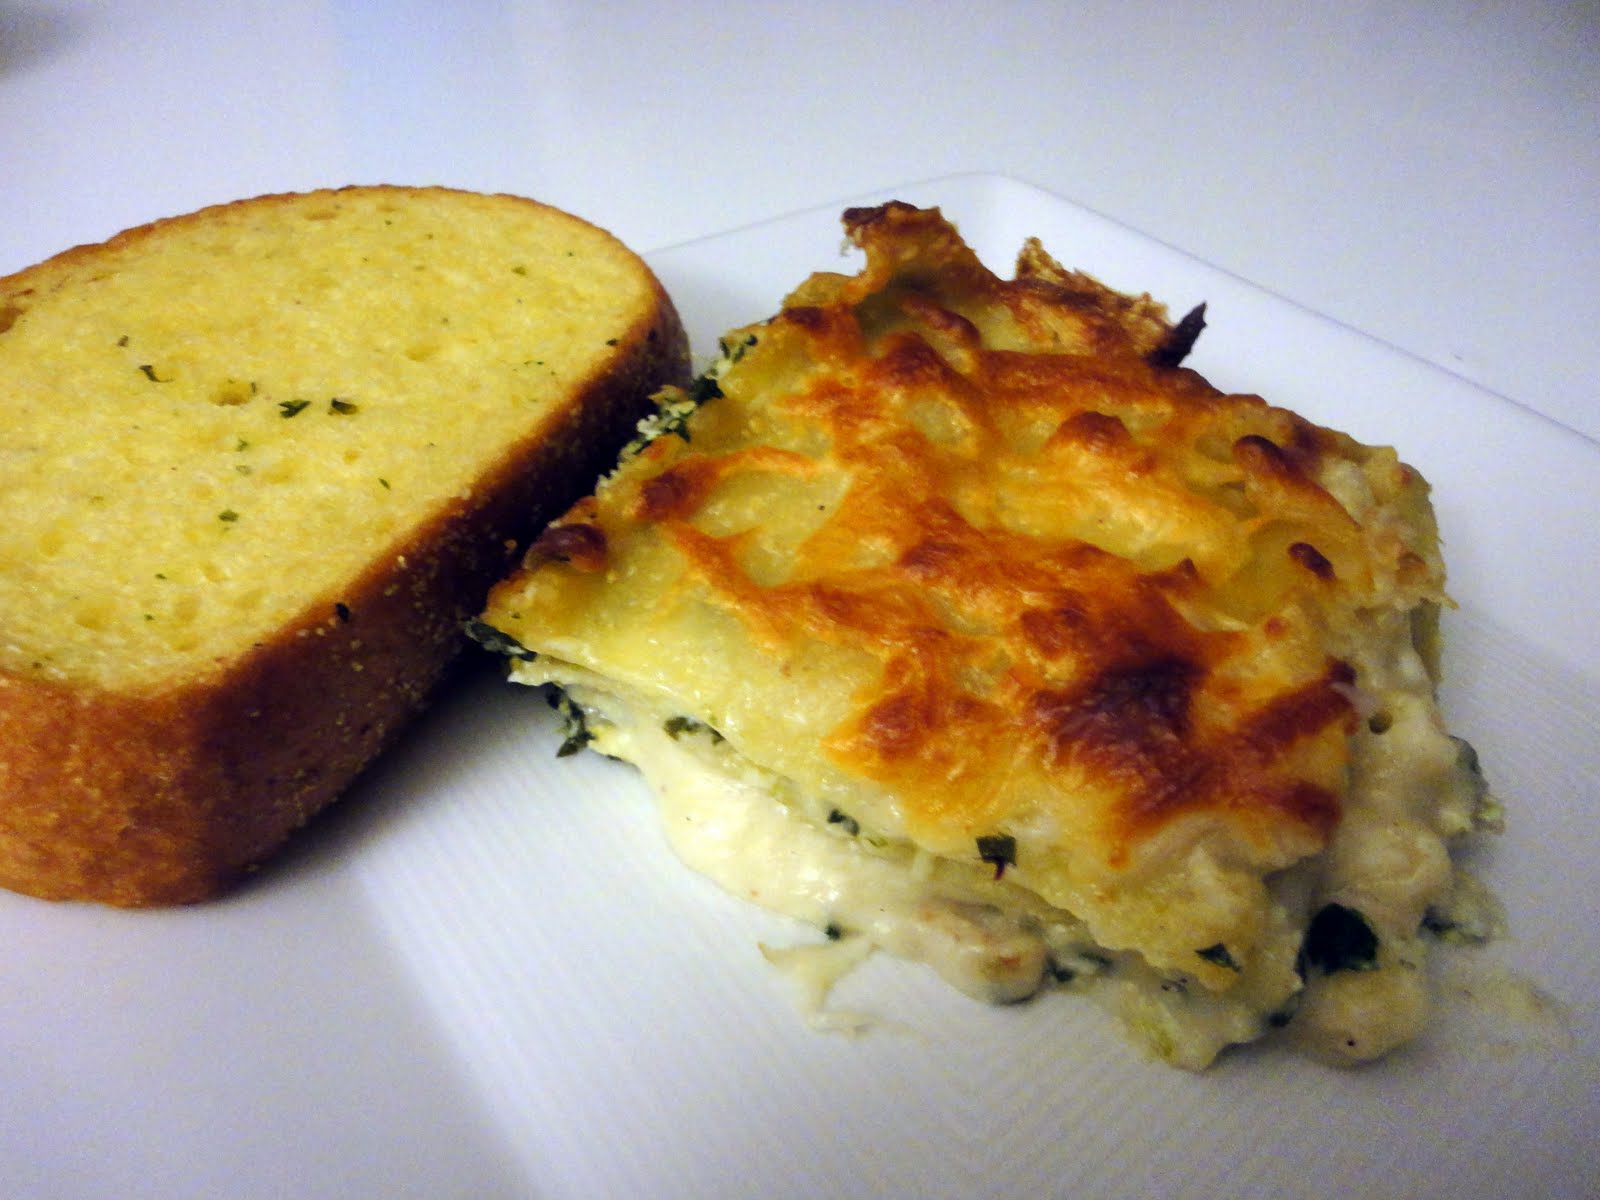
Once the eggplant was roasted and cooled, I started layering the casserole. For some reason in my mind I was imaging this dish would be like a noodle-less lasagna with layers of eggplants instead of noodles. This was definitely the wrong way to thing about it. I could not spread out the ricotta mixture like you would with a lasagna because the eggplant is not sturdy enough. I ended up just putting dollops of the mixture around the baking dish and assumed once it was in the oven the cheese was going to melt and spread out anyway. After creating several layers, I put the casserole into the oven for 25 minutes. The recipe called for covering the casserole with foil sprayed with non-stick spray for this part. I'm not sure why spraying the foil was necessary. I guess if you filled your baking dish to the brim and the foil was touching the casserole but mine was not. After the 25 minutes, I sprinkled the panko-parmesan mixture on top, put it back in the oven for another 20-25 minutes until it was golden brown.


I sprinkled a little bit of fresh basil on top for color and we were ready to eat. Laura brought a salad with pears and a balsamic vinaigrette from Whole Foods and I toasted up some garlic bread while the casserole was resting. The casserole was delicious and both Phillip and Laura really enjoyed it. Like the original recipe says, it does not make an enormous amount of food like casseroles typically do so if you are trying to feed more than two I would definitely increase the original recipe. Thanks to Tracey's Culinary Adventures for the great recipe!

09.26.11_Veggie Tart


I came across a picture of a flaky crust covered in roasted vegetables and I thought, "that looks incredible." After reading the recipe and realizing that the roasted vegetables were sitting on top of hummus, it only made me more excited for this dish. The website that had the recipe was unfortunately not in English so I had to improvise a little bit. Thanks to Google Translate most of the work was done for me but apparently not all the words were translatable.  I'm still not sure exactly what was written where it said, "Since humus = BUUUN and vegetables browned in the oven = BUUUUN and tart = BUUN and USOOOR, it is obvious that this tart should be a dream. Non?" Perhaps BUUUUN equals GOOOOD?

Anyway, I got the gist of the recipe and I decided to use store bought hummus instead of making my own like the recipe suggested. On the way to the store I realized that most puff pastry or phyllo dough comes frozen and I had not planned far enough in advance to have time to defrost the dough. We decided that we would use the Pillsbury Crescent Roll dough as a substitute and it would be just as buttery and flaky and delicious.  In the end it was, but getting there was much more difficult than I anticipated.

I really hoped to just pop open the can of dough, put it on a cookie sheet and call it a day. Unfortunately the can of crescent rolls we bought had torn dough inside. I was afraid that the dough wouldn't all cook together into one sheet so I figured I could just ball up the dough, and re-roll it out. This did not work. The dough just sprung back to the original shape and was proving to be quite difficult. After an aggravating 10 minutes or so,  I finally was able to just mash it out with my hands until it was a reasonable size and shape. I put the dough into the oven to bake until it was golden brown.


While the dough was cooking I also roasted the vegetables. We used squash, zucchini, eggplant, and I put tomato and a shallot on my half. I just tossed the veggies with EVOO and S&P before putting them in the oven.  After both the dough and the veggies were ready, I took them out of the oven and spread some hummus (we used Cava Mezze Spicy Hummus from Whole Foods) onto the dough. Phillip and I then topped our own halves. After the mishap with the dough it still turned out super tasty. It was like a make-shift pizza with hummus instead of marinara sauce. And who doesn't love roasted vegetables?! This would be a super easy dish to whip together last minute with whatever vegetables you have lying around that you need to use up before they go bad.

09.19.11_Spinach and Goat Cheese Quiche


Hello everyone! This is Phillip, for once. I'm not much of a cook, unless you want some killer shells and cheese, but Jonathan and I decided that a Spinach Quiche would be a great recipe for me to try. Jonathan found this recipe on Spoon Fork Bacon, and it looked - like all of their dishes do - phenomenal.

I started out by preheating the oven to 425 degrees and grabbing a mixing bowl. All the ingredients will end up in this bowl, so you might as well get a large one. The recipe calls for three full eggs and two egg whites. If anyone is watching you do this, it is extremely vital that you crack the eggs with one hand, so that you look as cool as possible. After the eggs, I mixed in 2/3 cup milk and 1/3 cup heavy cream, some S&P, and whisked it until everything mixed together.
Back off Morimoto, I got this.
My happy helper Jonathan sliced half of a red pepper and grated a cup of Fontina cheese while I sauteed the spinach in olive oil with some salt and pepper. You need about a full cup of cooked spinach, which came out to three or four handfuls of fresh spinach. After I cooked the spinach, I used my hands to wring out the excess liquid. Using my rockstar knife skills, I chopped up the spinach and set it aside.

The pie crust I used was a frozen 9" Whole Foods crust that we thawed in the fridge overnight. Jonathan placed his peppers in the bottom of the crust while I spread around my chopped spinach on top of the peppers. Back to the mixing bowl, I added a tbsp of minced thyme with the Fontina cheese, gave it a quick stir and poured the entire mixture into the pie crust. Jonathan crumbled
some goat cheese on top, and it fit perfectly in the 9" crust.

I was a little paranoid about spills, so I put the quiche on a baking sheet before putting it in the oven. After baking for 20 minutes, I turned the oven down to 375. I peeked to make sure it hadn't overflowed or exploded, but thankfully everything looked fine. After 25 more minutes at 375, I pulled the quiche out of the oven and let it set for another 10 minutes to let it cool down and settle. I washed a bowl of grapes for our side, and we were ready to eat!

Overall, I'd call this a huge personal victory. It tasted delicious and was a huge step up from anything I think I've ever made before. The only change I made to the recipe was that I cooked it for five minutes longer on 375 than suggested and used skim milk instead of whole. In retrospect, I would have used a little less thyme. Even though it is one of my favorite spices, it seemed to take over the dish. I hope to have many more successes to share with you all in the future!


09.18.11_Homemade Whole Wheat Ravioli


I have always wanted to try and make my own pasta but I never have felt a need to buy a pasta maker. Since I do not have the pasta maker to evenly cut out long strands for linguine or anything like that, I thought ravioli would be a good idea because I could just roll the dough out by hand and if it came out somewhat "rustic" it would be fine. The recipe that I actually found was for whole wheat pasta (which doesn't contain egg) so I thought this would be another good dish to have with Caitlin. She was coming over for dinner on Sunday so I thought this would be a good opportunity to make them since I would have all day to figure it out.

I ended up using a few different recipes for my ravioli. The original recipe that I found said that they did not like the filling they used and the sauce didn't really appeal to me (it looked like a paste they spread on top of the ravioli). So I decided I would use the original recipe for the dough, and then find another recipe for the filling and sauce. I just looked on Food Network for "Butternut Squash Ravioli" and came across Emeril's recipe for Ravioli and Sage Brown Butter.
Before tackling the dough, I quickly sauteed one shallot in olive oil (instead of butter for Caitlin) with some S&P before adding a package of the defrosted squash puree I bought at the store. I cooked for a couple of minutes, added some nutmeg, and then let the mixture cool completely while I was making the dough. The dough was super easy to make. Just mix the all-purpose and whole wheat flower together with some S&P and a little garlic and/or onion powder. I sifted the all-purpose flour to get rid of any clumps but when I sifted the whole wheat flour, all the little brown flecks of what I'm assuming were the wheat were left in the sifter. I ended up dumping those back into the mixture since I did not want to separate out the wheat! Then add in the wet ingredients which were just water and I added a tablespoon of maple syrup for sweetener. I had to add a little more water than the recipe called for to get all the ingredients combined and at a good consistency.

Next came the tricky part. My tiny kitchen really does not allow room for big projects like this and I also did not have a very big cutting board so I was really tight for space. I split the dough in half and rolled the first half out on a floured cutting board. I had to open the rolling pin my sister had given me a few years back since I had never used it (have I mentioned I don't back much?). After the dough was rolled out to the size of my cutting board I spooned on tablespoon of the squash mixture onto the dough. I managed to fit three rows of four on the dough, leaving about an inch in between each blob of filling.


Next, I wet my finger and drew a grid around the filling scoops so that when I laid the other layer of dough on top they would stick together. I rolled out the second half of the dough on another cutting board and when it seemed as big as the other piece of dough, I used my rolling pin to pick up the dough and gently laid it on top of the dough with the filling on top. I then took my finger and run it around all the spoonfuls of squash mixture and pressed the doughs together. I used a pizza cutter to cut the ravioli into squares and tossed the leftover dough back into my mixing bowl. I used a fork to crimp all the edges to keep the ravioli together and to make it look pretty and homemade. I then used the leftover dough to make a few extra ravioli. I ended up with 14 ravioli, but they were pretty big.

I prepared the ravioli earlier in the day an then covered them with plastic wrap until Caitlin came over. When we were ready to eat I brought a big pot of water to a boil and dropped the ravioli in. The ravioli cooked for about 4 minutes or so before I strained them in a colander. While the water was coming to a boil, I made the Sage Brown Butter for me and Phillip. I melted a stick of butter, added 12 leaves of sage, and just let it cook until it became brown, stirring occasionally.


I was really impressed with how the ravioli came out. None of them fell apart while cooking or being drained and they tasted delicious. It definitely took some time but it was fun to make my own pasta from scratch and I'd like to try it again and make regular pasta. I served the ravioli with garlic bread and a side salad. The salad consisted of spinach leaves, candied walnuts, and grapes. Yum! Caitlin and I used my favorite Raspberry Walnut Vinaigrette and I made a Apple Cider Vinaigrette for Phillip. If you are looking for a fun weekend project I would definitely recommend trying to make your own pasta!

09.16.11_Poached Eggs on Ricotta Toast


Poached eggs is another one of those things that always scared me to try. I don't know why but the idea of just dropping an egg into almost boiling water seemed like a situation where a lot could go wrong. After my successful attempts at other dishes that scared me (aka the gnocchi and the risotto) I decided it was time to conquer my fears of poached eggs. Trusty Rachael Ray had just posted a recipe for Poached Eggs on Ricotta Toast from her magazine and since she has not led me astray yet, I decided to use her recipe (the delicious pictures didn't hurt either).

I felt like I had watched enough Food Network and Top Chef to know the basics. I had always seen/heard that you should spin the water before dropping the egg and that adding vinegar will help the egg coagulate faster and more cohesively. Being the worrier that I am, I did some research on poaching eggs and found most reviews saying that the vinegar was really not necessary and would change the flavor of the eggs. I also did not want to poach the eggs one at a time so I would not be able to spin the water or else all the eggs would collide and merge into one monstrous poached egg. I decided to throw everything I thought I knew about poaching eggs to the wind and just had to go for it!

Before attempting my first poach, I got everything else ready. I had read on multiple blogs and websites that the time it takes to poach the eggs goes fast so you should have everything else ready first. Ray Ray's recipe called for steamed asparagus but I do not have a steamer. I Googled "how to steam asparagus without a steamer" and came across this handy video. All I had to do was add a little water to a pan and add the asparagus after the water starts to simmer. Super simple. While the asparagus was "steaming" I toasted up the bread and spread the ricotta onto the toast. We decided to leave the bacon out of the recipe so that it would be a vegetarian dish. I put four pieces of asparagus onto each toast and then the time had come to poach the eggs.

Perfectly runny yolk! Just the way I like it!
Instead of using a big pot I used a deep-sided skillet for poaching the eggs. I thought this would be easier to keep track of the eggs since I was poaching four. I got the water to just below a boil and cracked the first egg into a small Pyrex bowl. I dropped the egg into the water and watched anxiously as the egg started to cook. I repeated the process and was able to fit three eggs into the pan comfortably. I probably could have fit the fourth but didn't want to push my luck. Each egg cooked just enough before adding the next egg so they would not stick together. In the end we have four pretty poached eggs for our toast and I managed not to pop any of the yolks in the process.  I served the Ricotta Toasts with some orange wedges and called it a day on our breakfast for dinner.

09.12.11_Falafel Burgers


Phillip and I had falafel several times throughout our month of vegetarianism, our first night, and at Lebanese Taverna to name two, but it was definetiely something we both enjoyed. I came across this recipe for Rachael Ray's Falafel Burgers and I thought this would be a fun new way to eat falafel. I also had not made falafel from scratch so I was excited to see that the recipe did not use the box mix.

Making the "batter" was super simple. All I had to do was combine the ingredients (chickpeas, red onion, garlic, flour, cumin, coriander, chili powder, turmeric, and S&P) in a food processor.  I left out the parsley because I didn't have fresh and decided there were enough flavors going on already with all the spices. After all the ingredients were evenly mixed I divided the mixture into four even portions and formed them into patties.

The patties right after they came out of the skillet, top with cucumber slices.
The burgers cooked in oil in a skillet for a few minutes on each side. The recipe calls for 3 minutes on each side. I probably did a little bit longer hoping to get a bit more of a crust on the burgers. We served the burgers in pita with sliced cucumber and instead of the tahini sauce Rachael made we just used store bought spicy hummus. The burgers tasted just like falafel and were just as delicious the next day for lunch. I ate my leftovers on one of the Pepperidge Farm Deli Flats rather than the pita because the pita was so thin it kept falling apart on me during dinner. The Deli Flats tasted just as good though, if not better in my opinion!

09.10.11_Aloo Gobi Chana


During our month of vegetarianism we had made multiple Indian dishes, the Paneer Tika Masala and the Vegetable Curry. When I found the recipe for the Tika Masala I also looked up other Indian dishes that may be good. I came across a recipe for for Aloo Gobi (potatoes and cauliflower), another one of Aarti Sequeria's recipes. I ended up not making it during the month of August since I had so many other recipes I wanted to try, but kept it on our list of recipes to make at some point.  Caitlin just moved into her new apartment on Saturday and I thought this would be a perfect opportunity to try this recipe since it was vegan and could serve as a housewarming gift for her.

This was honestly one of the easiest and quickest recipes I've ever made. First, mix the spices and water together to make the masala (spice mix). Then saute a serano pepper in some oil with cumin seeds. Add the masala and cook for a few minutes. Finally, mix in the potatoes, cauliflower, and water until everything is well mixed and the potatoes and cauliflower are completely coated. Cook for 20 minutes and that's it!
Doing our part to end Breast Cancer
I only made two modifications to this recipe. I decided to add chickpeas to the mix to make it a little more hearty, and I also used frozen cauliflower instead of fresh (we still had cauliflower leftover from when we made the Vegetable Curry). I served the Aloo Gobi, now Aloo Gobi Chana because of the addition of the chickpeas, with basmati rice and garlic naan. We celebrated Caitlin's move with a bottle of champagne and by eating Indian food while sitting on the floor, because she didn't have any of her furniture yet. Super classy.

Caitlin and Phillip enjoying some Indian on the floor.

09.06.11_Spinach Lasagna with Bechamel Sauce


And we're back! After a week away we decided it was time to start back up on the blog! The past week has been a little bit of a roller coaster. The first couple of days I made some poor decisions about the type of foods I decided to eat. Our first meal back I really wanted a buffalo chicken sandwich but the bar we were having Happy Hour at had this special for chicken tenders. I ended up getting those with a side of hot sauce. The deep-fried chicken and greasy french fries was probably not the best way to reintroduce myself to meat. I felt terrible after. I highly doubt it was the chicken but it was still not a great first experience. The next day we were hanging out with our friend Amanda and we all decided to get McDonald's for dinner. Classy I know. Once again, not a great decision. Since then I would say about half of my meals have been vegetarian. I think I will continue to eat a lot of vegetarian meals but have meat every once in a while or for special occasions.

For our first blog post after our hiatus I decided to make a Spinach Lasagna with Bechamel Sauce. I felt like I had tried all kinds of new things in August so this would be a yummy dish that we were familiar with and who doesn't love lasagna? I had made this lasagna several years ago in college and decided I would try to just recreate it from memory. I looked up a general recipe for lasagna to make sure I bought enough ricotta, mozzarella, etc, but then the rest I just kind of made up (for the actual measurements and ingredients I used see the end of the post). I always forget how much work a lasagna can be because once it's all done its in one dish, but you forget how many pots and pans you dirty to get there, especially if you are making your own sauce!
To start I put a big pot of water on the stove for the noodles. While waiting for the water to boil, I started making the bechamel sauce which is basically just a normal white sauce. To make the sauce you first have to make a roux, which is just a mixture of equal parts butter and flour. I melted butter in a sauce pan and slowly whisked in the flour. After cooking the roux to get rid of the flour taste, I slowly added the milk. Once it was a good consistency, I seasoned with fresh nutmeg and S&P.

While the noodles were boiling, I sauteed half an onion and two cloves of garlic in a little bit of EVOO. In a separate bowl I combined a package of ricotta cheese, two eggs, a handful of mozzarella cheese and about a palm-full of Parmesan cheese. I then added the onion and garlic mixture as well as one packaged of frozen spinach that I had defrosted and squeezed all of the liquid out of. I zested a lemon, squeezed half the juice into the cheese mixture, and added S&P to season the mixture.

Once the noodles had cooked for about 12 minutes I started to layer my lasagna. First a little bit of the bechamel sauce on the bottom of the baking dish. Then a layer of lasagna noodles. I topped the noodles with a third of the cheese mixture and spread it out evenly. Finally a layer of the bechamel sauce top with a sprinkling of mozzarella cheese. I repeated this three times and then topped with another layer of noodles, a layer of the bechamel and finally the rest of the bag of mozzarella cheese.  The lasagna went into a 350 degree oven for an hour and came out golden brown on top. The next time I make this recipe again I would only zest half of the lemon or leave out the lemon juice and consider adding a little more spinach.


Bechamel Sauce Ingredients
2/3 stick of butter
2/3 cup of flour
4 cups milk
Salt and pepper
Freshly grated nutmeg to taste

Lasagna Ingredients
1 box lasagna noodles
1 box frozen spinach (defrosted and drained)
1 package ricotta cheese (15 oz)
1 cup Parmesan cheese
4 cups shredded mozzarella cheese
1 lemon
2 eggs
2 cloves garlic
Half a medium onion or one shallot
Salt and pepper
Extra-Virgin Olive Oil