12.27.11_Fresh Corn Soup with Roasted Corn Guacamole


Happy Holidays! Man has it been a busy couple of weeks! Phillip and I just moved into a new apartment right before Christmas so needless to say we've been all over the place. We finally got the chance to cook the first meal in our new apartment. One of the gifts Phillip got me for the holidays was an immersion blender so I wanted to make something that I could use the blender for. We decided on a soup and I thought a corn soup would be good since I had never made it. We found this recipe that they served with a roasted corn guacamole so I thought that would be perfect since in my mind I wanted to soup to be tex-mex-y.

This was the first meal where Phillip and I were actually able to cook together because our kitchen is finally big enough to have two people standing in it! To get the corn ready for the guacamole we added a tablespoon of olive oil, salt and pepper to 2 cups of defrosted frozen corn. I spread the corn out evenly on a foil-lined baking sheet before putting the corn into a 450° oven for 20 minutes. Phillip decided he wanted to tackle the guacamole so he diced a tablespoon of red onion, a seeded jalapeno, and then zested and juiced a lime over an avocado before seasoning with salt and pepper.

Phillip zesting in the new kitchen!

While Phillip was dicing, I made the soup. All I had to do was defrost some frozen corn, then blend 3 cups of it. I then had to saute half a red onion, a clove of garlic, and a jalapeno after it was seeded. After the onions were translucent I blended the sauteed veggies and added it to the corn mixture. In a pot I combined the blended veggies and cooked them for a few minutes before adding in 1.5 cups of vegetable stock. The soup simmered for 15 minutes while we finished making the guacamole.

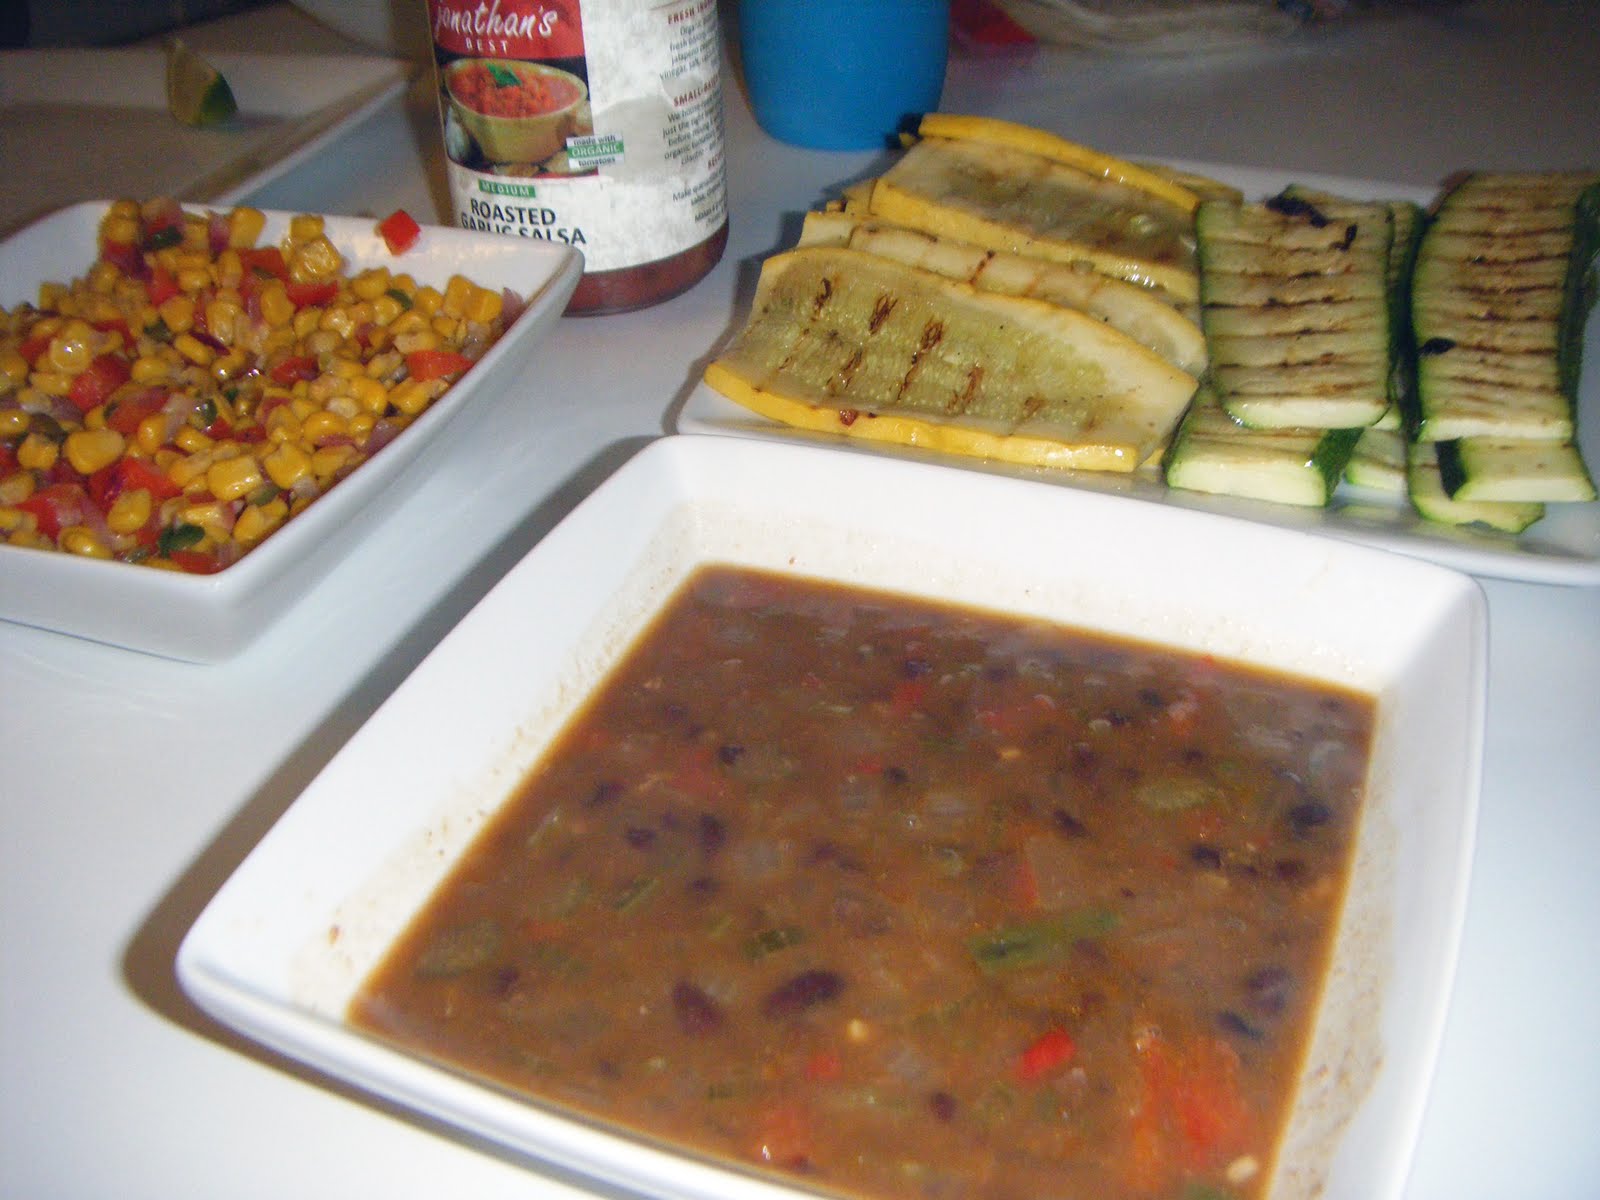
After the corn had roasted for 20 minutes we took it out and let it sit for a few minutes to let it cool before adding it to the guacamole Phillip had made.  After the guacamole was finished and the soup had simmered it was time to eat. We ladled the soup into our bowls before putting a large spoonful of the guac into the center of the bowl. I then drizzled some good olive oil (another gift for the holidays) over the soup. It was super tasty and as always incredibly easy. The recipe didn't make as much as I had expected. I would say it was closer to 4 servings but luckily we had refried beans on the side and extra guacamole to eat as sides.

12.14.11_Butternut Coconut Stew


A group of friends and I have started having a "dinner party" once a month. We rotate who hosts and use it as an opportunity to try new recipes that we've been wanting to try. I love butternut squash. And I love coconut. So when I saw this recipe I knew I definitely had to try it. The recipe also called for quinoa which I had never made before so I was excited to try something new.

I went to Safeway because they always sell peeled and diced butternut squash. Of course, it was a sale item this week so they were completely sold out. I was forced to buy a fresh butternut squash which, if you remember from my butternut squash risotto, is quite the process to peel. Once the squash was peeled and cubed, the process was significantly easier. I also decided to double the recipe since there would be five of us for dinner and I always like leftovers so there was a lot of stew!

While the 4 cups of squash were cooking in boiling water for about 15 minutes, I sauteed a large onion, a jalapeno, 4 tbs fresh ginger, and 4 cloves of garlic then seasoned with a little salt. After the squash was cooked I drained it, put it back in the pot, then added the sauteed onion mixture. I then added a 28 oz can of diced tomatoes, a 28 oz can of drained and rinsed chickpeas, and then a cup of coconut milk. The recipe called for lite coconut milk which we could not find so we combined 1/2 cup of the coconut milk with 1/2 cup of water to thin it out a bit. I didn't want the coconut flavor to compeltely overpower the dish. After all the ingredients were combined I just had to bring the pot back up to a boil, then cover and reduce to a simmer for 15 minutes, stirring occasionally.

I waited until everyone had gotten to my apartment before I put the quinoa on. It was super simple. I just added 1.5 cups quinoa to 3 cups of water, brought to a boil, then covered and reduced to simmer for 15 minutes. Once the quinoa was cooked dinner was ready! I scooped a little bit of quinoa into everyone's bowls then laddled on the stew. It was super yummy and perfect for a cold winter day. My photographs came out terribly for some reason so if you want to see really amazing pictures of the stew, check out the original post I got the recipe from!

12.11.11_Spinach Stuffed Shells


A few months ago I made Giada's stuffed shells with arrabbiata sauce. The recipe was in one of the first cookbooks I ever received as a gift. They were super delicious but had pancetta in them. We were trying to figure out what we could make for dinner without having to buy a ton of ingredients and I noticed that we still had half of the jumbo shells left from the last time we made these. I decided we could make it vegetarian by leaving out the pancetta but I added spinach to make it a little more than just noodles, cheese and sauce.

After bringing water to a boil and dumping the remaining half of the box of jumbo shells, I sauteed a bag of spinach. I went ahead and used the entire bag because it wilts so much. I added some fresh grated nutmeg ("That little something that makes you go, hmm what is that?" - Rachael Ray), salt and pepper. I then let the spinach cool a bit while I mixed together the cheese mixture which consisted of:

15oz of ricotta cheese
1/2 cup of shredded mozzarella
1/2 cup of parmesan
2 egg yolks
1 tsp of salt
1 tsp red pepper flakes
Black pepper to taste
1 tsp of dried parsley 
1 tsp of dried basil
1 clove of garlic
Once the spinach had cooled, I added it to the mixture. I then drained the noodles and sprayed a baking dish with nonstick spray. I stuffed each shell with about a tablespoon of the cheese mixture then put them into the baking dish. After the shells were all stuffed, I poured some marinara sauce I had in the fridge over top of the shells. I used about 2 cups. The shells baked for 30 minutes in a 350°. The shells were super yummy and I even had leftovers to take for lunch the next day!

12.08.11_Pineapple Fried Rice


When I went to Thailand last year I think I ate fried rice more than anything while I was there. Since then I randomly crave Basil Fried Rice. A couple of months ago I made it and it came out really well, but it had chicken. I decided I would try to make Pineapple Fried Rice for a vegetarian version. I just googled pineapple fried rice and came across two different recipes that were very similar. I just randomly chose one of the recipes of the two and went for it.

I cooked jasmine rice while I chopped up 2 shallots, 3 cloves of garlic, and a green chili. While the rice was cooling, I sauteed the shallots, garlic, green chili, and a shredded carrot. Then I added an egg and basically scrambled it into the mix. Once the egg was cooked I dropped in the pineapple, added the rice and a mixture of soy sauce and curry powder. Once it was all mixed together I cooked the rice for a couple of minutes before garnishing the rice with some green onions for some color.

I chose to leave out the currants and the cashews to keep it simple. Apparently I was super out of it when I made this because I forgot to add the peas and coriander. I really wish I had a wok! I did 1.5x the amount of rice to have leftovers and folding all that rice into the mixture of vegetables, pineapples, and sauce was super difficult in a small saute pan. Other than the difficulties of mixing the rice and being a space cadette and leaving out two of the ingredients the rice came out good. Phillip really enjoyed it so that's always a good sign.

12.06.11_Chickpea Spinach Sliders


So I'm not sure why the recipe we found for these burgers was called Chickpea Spinach burgers. True, there are chickpeas and spinach in them, but that's only two of a long list of ingredients and they are probably two of the more subtle flavors in these burgers. I will say, however, that the name alone got me to try them. We decided to make sliders because our previous experience with "burgers" resulted in a mushy center (see Edamame Burgers, Falafel Burgers, and Ginormous Tofu Burgers) so we figured if we made them smaller that would be cute and practical.

The recipe called for:

-1 medium onion
-3 cloves garlic
-1 c. chickpeas
-3 c. packed spinach leaves
-1 carrot
-2 tbsp. soy sauce (I used Tamari instead)
-1 tsp. cumin
-2 tbsp. peanut butter
-1 tbsp. yeast
-1 tsp. sriracha hot sauce
-1/2 c. chickpea flour (I used whole wheat flour)

Cook the onions and garlic, then add the spinach and carrot until the spinach has wilted. In a large bowl, combine the cooked mixture and the remaining ingredients until thoroughly mixed. Then let the mixture cool. I went ahead and portioned out the mixture into patties and lined them up on a cutting board, because I figured they would cool faster individually then all together in one big bowl.

After the mixture has cooled some, form patties, and pan fry in some oil. I used olive oil and cooked each slider for 2-3 minutes per side. We served the sliders on potato slider rolls alongside, what else, french fries. The burgers were very flavorful. I tasted the peanut butter the most but it gave them a nice creamy texture. Phillip had an issue with the number of onions (considering he doesn't like onions) but overall they were tasty!

11.28.11_Curried Broccoli Couscous


Ok. So maybe I felt guilty for doing so few posts this month. We decided to try and fit in one more veggie meal this month to try to make up for our delinquency. Lucky for me, Real Simple tweeted out a recipe for Curried Broccoli Couscous that sounded super yummy yesterday so I decided to give it a try.

Now I know we talk about how easy all of these recipes are but really, this recipe was insanely easy. All you had to do was saute broccoli florets (I used fresh broccoli but I'm sure frozen would work just as well) in a sauce pan with olive oil then add curry powder to coat the broccoli. Next add in golden raisins, chickpeas, and water and bring to a boil. Finally, add the couscous, remove from heat, cover the pan and let sit for 5 minutes. That's it. I was afraid the couscous wouldn't cook completely because I had never cooked couscous with other food in the same pan but it came out great.

To add some more texture and flavor I decided to use more than just the golden raisins. We found a mixture of golden raisins and craisins at the store and thought that the craisins would add a nice color and tart flavor. I also topped the couscous with sliced almonds for a little bit of sweetness and for a nice crunch. We ended up making 1.5 times the recipe so that we would have enough leftovers for lunch the next day. So scrumptious!

11.22.11_Ginormous Tofu Burgers


I know, I know. It's been almost a month since our last post. We're bad bloggers. November has been crazy busy with business travel, vacation, and Thanksgiving so sadly we have not had much time for vegetarian recipes this month. After realizing it was going on a month since our last post, I told Phillip he could pick out a recipe he wanted to try. Shockingly he came back to me with a recipe from (Never Home) Maker for tofu burgers that were literally too big to bite. Phillip, wanting a burger? Never.

I was a little doubtful of this recipe at first. While I have enjoyed most of the tofu dishes we have made, I still am not a huge fan of the taste of tofu by itself. I was worried that that patties (made primarily of tofu) would still taste tofu-y and I wouldn't like them. Luckily, I was wrong and the flavors of the burger turned out great.

For the burger patties, the recipe called for
  • 1 package extra-firm tofu
  • 1 small (or enough to make up 1 small) potato
  • 1/2 cup whole wheat flour
  • 3 tablespoons nutritional yeast
  • 1/4 cup sesame seeds
  • 2 tablespoons soy sauce
  • 1 teaspoon curry powder
  • 1 teaspoon cumin powder
  • 1 teaspoon garlic powder
  • Pepper to taste
A couple of things to note: I drained the tofu first. The recipe didn't say anything about draining the tofu but I have yet to use tofu without draining it so I stuck with what I know. We used 5 purple fingerling potatoes to make them colorful like the recipe used. I also had yeast already but it was not nutritional yeast. I used it anyway and it still worked fine. I think you could omit this completely if you wanted.

To make the patties all I had to do was combine the tofu and the potatoes in a food processor and mix. Then in a large bowl, combine the remaining ingredients and the tofu-potato mixture. The mixture itself was stickier than I imagined so if yours is like that too, don't worry. After the ingredients are combined, split the mixture into 4 equal parts to form patties. Place cheese on top of one of the patties and then put another patty on top. Then squish the edges of the two patties together so the cheese is hidden in between the patties.

These bad boys were MASSIVE.

To cook the burgers just add some oil to pan and pan fry on both sides for a couple of minutes. I also covered the pan with aluminum foil so that the burger would be cooked all the way through and to help the cheese melt. Flipping the burgers was a bit daunting and challenging because of the sheer size of these honkers. They stayed together better than I expected so we were able to avoid a kitchen meltdown on my part.

We served the burgers on rolls from Whole Foods, topped with avocado (and mustard for me) but decided to put the sweet potatoes on the side (the burger was big enough already!). I could only finish half of my burger, which I had to eat with a fork and knife. You can tell from the picture with Phillip holding the burger just how enormous these things really were. Both Phillip and I agreed that if we make these again we would make them like a normal burger and not double up the patties with the cheese hidden inside. I like to be able to bite my burgers! Overall though a fun new way to use tofu in a dish.

10.27.11_Samosa Baked Potatoes


I love samosas. And I love potatoes (they are actually in my top 5 favorite foods). So when I saw a recipe for samosa inspired baked potatoes there was no question whether or not these would be made sometime in the near future. I mean honestly, who would not want these?

As always, this recipe could not have been an easier. It was basically like making twice baked potatoes but with samosa seasoning. Pierce two potatoes with a fork or knife and bake them in a 400 degree oven for about an hour. Towards the end of the hour prep the other ingredients. Saute half an onion (I used one large shallot instead), 1.5 tsp minced ginger,  1/2 tsp mustard seeds, and 1.5 tsp curry powder for about 5 minutes in a little olive oil.

Once the potatoes are fully baked, slice them open and scoop out all of the potato while keeping the skin in tact as much as possible. Combine the potato, onion mixture, 1/8 cup cilantro, 3/4 cup peas, and 3 TBS of butter. I used frozen peas that I quickly defrosted in the microwave. I feel like canned peas would not be very good in this dish, but what do I know? If you don't have fresh cilantro you could substitute the dried stuff, but don't use nearly as much! I looked up online how much dry spice to use instead of fresh and ended up using about 2 TBS of dried cilantro. It worked just fine but I think the fresh would make a big difference.  Next, mash it all the ingredients together with a fork or potato masher and add S&P to taste. Then scoop the potato mixture back into the potato skin and that's it.

I topped mine with a dollop of plain yogurt. I really liked the addition of the tangy yogurt with the flavors of the potato. So simple and incredibly filling and delicious. I originally thought I would make a vegetable or something on the side but we ended up not needing it because the potatoes were so filling on their own.

10.24.11_Paneer Jalfrezi


I'm not sure why I never cooked Indian food prior to our vegetarian adventure. It comes across as super complicated when in reality the Indian dishes I have made have been some of the easiest and least stressful out of the bunch. The Paneer Tikka Masala was straight forward and delicious, the Aloo Gobi Chana literally could not have been easier, and now adding to that list, I made Paneer Jalfrezi which involved nothing but prep work. So simple.

When I came across this recipe I was originally drawn to the bright colors of the food. Phillip and I both really enjoyed the paneer in the Tikka Masala dish so I wanted to try another dish with this. We both enjoy spicy food as well so when I read that this dish packed some heat I was excited about it. The other great part about this recipe was that I already had most of the ingredients from past recipes, all we had do buy was a little bit of produce.

I decided it would be easiest to do all the prep work at once so that when it came time to cook all I would have to do is add the next ingredient to the pan rather than ferociously chopping while something else was already in the pan. I even let Phillip help and for those who have lived or cooked with me, they know this is a big deal. We sliced up an onion (I used half instead of a full one since Phillip isn't a huge fan), two Roma tomatoes, a bell pepper (Phillip chose red), a pretty big Serrano pepper (instead of 2 Thai chilis), and minced 3 cloves of garlic and an inch of ginger root. Phillip cut the paneer into little strips as well.


Once everything was chopped I started the rice I was going to serve the dish with since that always takes the longest. After the rice was simmering for about 5-10 minutes it was time to start cooking the main course. All you had to do was add cumin and coriander seeds to some hot oil, then start adding the ingredients a few at a time. The recipe had a very specific order and amount of time for each ingredient so I did my best to stick to it. In addition to the ingredients we chopped up, the recipe also called for salt to taste, 3/4 tsp of tumeric, and 1.5 TBS of red chili flakes. I did about half the chili flakes this called for because I did not want to die from this meal.  In the end all of the ingredients ended up in the same pan and mixed together. After everything was cooked,  you remove the mixture from the heat and sprinkle it with 1/4 tsp of sugar, 1/2 tsp of garam masala, and 1.5 TBS of white vinegar or lemon juice (I used a combo).


We served the Paneer Jalfrezi over the rice and also had some naan I had put in the freezer from when we had the Aloo Gobi. The dish made more food than I expected and there was enough leftover for Phillip to take for lunch the next day. The next time you think about attempting to make Indian food I say go for it. You'll probably be surprised how easy and delicious it ends up being.

10.23.11_Fall Festivities


On Saturday we took a group of friends down to Charlottesville to go apple picking at Carter Mountain Orchard and then do some wine tasting. I hadn't been apple picking since I was a kid and was excited to go again. The views from the orchard are amazing and we had a perfect day. Phillip and I had looked up a few recipes we wanted to try before we went down so we knew how many apples we would need to pick. We ended up with 15 Fuji apples and one pumpkin, perfect for an apple crisp, homemade applesauce and pumpkin seeds!

I forgot how easy making applesauce is. The part that took the longest was peeling and coring the apples. Phillip and I both used paring knives to peel the apples. I tried to be all Top Chef and act like I was in the mies en place relay that they always do on the first episode. Sadly, if I were a contestant I think I would be eliminated immediately. I did almost peel an entire apple without picking up my knife once, creating one single curly-cue of apple skin. Impressive I know. We peeled 7 medium-sized apples, cored them, and then quartered the apples before adding them to a cup of water, 1/4 cup sugar and 3/4 tsp of cinnamon. Cook the apples of medium heat, covered for 15-20 minutes and then they are ready. I don't like very chunky applesauce so I transferred the apples to the blender and gave them a quick whirl. The applesauce was super delicious and made a good amount!


Next up was the apple crisp. We found lots of different recipes for apple crisps and we finally settled on one that had no eggs and it was super easy. While the oven preheats to 350 degrees, peel, core, and slice 6 apples (we did 7 because they were kind of small), then mix the apples in a baking dish with 2-3 TBS of sugar, 1/4 tsp of cinnamon and a TBS of flour. In a separate bowl, mix 1 cup flower, 5 TBS brown sugar, 2 TBS sugar, and a stick of butter (diced into tiny pieces). We decided to use 1/2 cup of oats in place of nuts, because Phillip and I both love oats! I also was not thrilled about using an entire stick of butter in this, but I figured we rarely eat or make dessert so we decided to splurge. We also subbed Granny Smith apples for the Fujis we had picked. The crisp baked for 1hr and 15mins and then it was ready! We served it with some ice cream we had in the fridge. Yum!


The final task of the day was carving our pumpkin! When I was a kid, my mom would always clean and roast the seeds while we carved our pumpkins so that when we were all done, the pumpkin seeds would be ready for us! They were never anything fancy but I loved them. After scooping out all the seeds and cleaning off the gook from the pumpkin, we put the seeds on a baking sheet, sprinkled with salt, then baked on 300 degrees for about 45 minutes, flipping the seeds every 10 minutes or so. So simple and so good. While the seeds were in the oven I was able to carve our pumpkin. We decided to do Sylvester and Tweety since that is what we are dressing up as for Halloween! Such a fun Fall weekend!

10.18.11_Caulifower Cakes


Now that we are doing fewer vegetarian meals per month I've been wanting to choose recipes for things that I have either never had or never made before. While I like eating vegetarian because it generally makes me feel better, I also like trying to make new things to keep it exciting for me. I found this recipe for cauliflower cakes and I was intrigued for multiple reasons: 1) They reminded me of latkes or potato pancakes, which I love. 2) They had garam masala in it and now that I have a huge amount of this from when we made the Paneer Tikka Masala I was excited at the prospect of using it again.

As always the recipe was super simple. Combine the following ingredients in a big bowl, mix them together, then drop 2 tablespoons or so of the "batter" into a 1/4 cup of oil in a skillet.
  • 2 cups grated cauliflower (1 medium size head of cauliflower)
  • 1/2 large yellow onion (approximately 1 cup chopped)
  • 3 tbsp flour
  • 3 eggs
  • 3/4 cup milk
  • 1/2 cup panko crumbs (optional, for texture)
  • 1/2 tbsp garam masala
  • 1/2 tbsp salt
Each cake cooked for a couple of minutes on each side. I felt like Hanukkah came early this year and I was frying up the latkes because it was exactly the same process. I was able to do four cakes at a time and transferred them to a plate with a paper towel after they finished cooking to get rid of some of the oil.

The recipe called for 10 minutes prep and 10 minutes cooking time. Either I'm extremely slow or the girls who wrote this recipe are crazy! The prep didn't take that long but grating the cauliflower took a while. I contemplated roughly chopping it and putting it into the Cuisinart instead but decided not to. I wish I had. I think the result would have been the same but in half the time without bits of cauliflower flying all over my tiny kitchen. The recipe also did not say how much this would make. Being delusional, I thought this would make a couple of cakes. I used 2 tablespoons per cake instead of the tablespoon listed in the recipe and I ended up with 18 cauliflower cakes! I ate 3 and Phillip had 4 to give you an idea of serving size, so needless to say, it took me a while to fry up all of these cakes when they take a couple of minutes per side for each cake.

I decided to serve the cakes on top of a simple salad. I wanted to make a homemade lemon vinaigrette to toss the salad with and also wanted to make an aioli to drizzle on top of the cakes. I realized after making this decision that I did not have dijon mustard, an ingredient that typically both of these would have in them. For the vinaigrette I just left out the mustard and whisked together 1/4 cup olive oil, 2 tablespoons fresh lemon juice, 1/2 tablespoon minced shallot, 1/4 teaspoon grated lemon peel, 1/4 teaspoon sugar, and S&P. I tossed the salad with the vinaigrette before plating it and sprinkled with a little coarse salt before placing the cakes on top of the salad.

For the aioli my original thoughts were to make my own from scratch. However after spending longer than I thought frying cauliflower cakes I decided to cheat. I took about two tablespoons of store bought mayo, added fresh lemon juice, a little squirt of regular mustard, a pinch of garlic powder and some S&P. My fake version of an aioli came out much better than I anticipated and was surprisingly good. I drizzled the sauce over my cauliflower cakes, cracked some fresh black pepper on top and called it a day. I really liked this dish. I could really taste the garam masala in the cakes and I thought the addition of the vinaigrette and the aioli complemented the cakes well.

10.17.11_Tostadas


Apparently October has been busy because this is my first post this month! Luckily I plan on having several vegetarian dishes this week so look for several updates over the next few days. Yesterday while thinking about what I wanted to eat this week I had a strong craving for fajitas. Phillip doesn't really like bell peppers or onions so fajitas are never that exciting for him so then I started thinking about refried beans.  Then I thought of tostadas. I haven't had tostadas in a very long time and I had actually never mad them so I thought this would be a great dish to try. Phillip suggested that instead of ground beef we could use Lightlife's Smart Ground veggie crumbles. We had tried them at Caitlin's a few weeks ago when she made us a Vegan Shepperd's Pie and we really enjoyed them.

After doing a little Googling Phillip told me that it seems that tostadas were almost always made with corn tortillas rather than flour so we decided to get these while shopping. I wasn't exactly how I should crisp up the tortillas. I figured I could either do it in a toast them up in a skillet, shallow fry them, or bake them. I searched online and found recipes that used all three methods. We decided to bake them to make them a little healthier than frying them and I figured it would be super easy, and it was. All I had do do was put a little oil (I used canola) on a baking sheet, rub the tortillas around in the oil coating both sides, then put them in a 400 degree oven. I baked the tortillas for about 15 minutes, flipping halfway through. They ended up super crunchy and nicely toasted. I would probably cut the time back a little next time to make them a little less browned.

While the tortillas were crisping in the oven, I cut up an avocado and some lettuce that I would use for topping my tostada. Then I cooked the Lightlife crumbles. This was fascinating. You cook the crumbles for a few minutes in a skillet after spraying it with nonstick spray. It looked exactly like ground beef, just without the oil pouring out of it. I seasoned the crumbles with cumin, cilantro, a little cayenne, Adobo seasoning, and S&P, the same as I would have if I were using ground beef. They actually sell Mexican flavored crumbles as well which would have been perfect but Whole Foods didn't have them.

Lightlife's Smart Ground Veggie Crumbles

After the tortillas came out of the oven I topped them with refried black beans, then the Lightlife crumbles, and then topped them off with shredded cheese. I put the tostadas back into the oven for another minute or so to let the cheese melt and then they were ready! They were super delicious and really satisfying. I topped mine with some salsa, lettuce, avocado, and sprinkled a little cilantro on top. The thing that's great about the tostadas is you can put whatever you want on them, just like a taco. I would definitely recommend making these if you are looking for a quick and easy meal and want to just use up somethings you have in the fridge. Delish.

10.11.11_Vegan Shepherd's Pie


For those of you that are frequent followers, you know me as “vegan Caitlin”. I was beyond excited when Jonathan and Phillip told me that they would be going vegetarian for a month, and am so happy that they’ve kept up with it pretty well since then. And after various shout-outs over the blog posts, I finally got the opportunity to contribute my own meal and post.

When the three of us went to the pride festival this summer, I picked up a PETA “Starter Kit” magazine. Once I got past the horrible pictures of mistreated animals, I found a few recipes that sounded really good. Jonathan even pointed out ones that he thought looked good (this was before the vegetarian experiment, so I was shocked that pictures of vegan meals got him interested). One of them was for Shepherd’s Pie, which I finally got around to making for all of us a couple weeks ago.

The recipe was really easy and didn’t require a lot of time or effort. I had to cook up some potatoes and then mash them with Earth Balance buttery spread, soy milk, salt and pepper.

Then I had to mix up some Lightlife veggie protein crumbles, vegan mushroom gravy (the recipe suggested Campbell’s, but I shop at Whole Foods, and they don’t sell Campbell’s, so I got something organic), mixed peas and carrots, and then a little garlic powder and cayenne. The recipe called for canned peas and carrots, but I used frozen and even without defrosting them, everything turned out fine. Once all of this was mixed up, I poured it into a casserole dish. Then I just spread the mashed potatoes on top and cooked the dish for about 40 minutes at 350.

Like I said, this was a really easy recipe, and turned out hearty and tasty. Jonathan and Phillip seemed pretty impressed with the consistency of the fake beef, and have used it again since. I served Tofutti Cutie ice cream sandwiches as dessert and even the imitation ice cream was a hit. If I can get them to enjoy nondairy cheese, I just might make vegans out of Jonathan and Phillip yet.

09.28.11_Eggplant Parmesan Casserole


Our friends Laura and Meghan have had us over for dinner a few times and after seeing all of the delicious things I had made in August, Laura really wanted us to have her over for dinner. We finally found a day that worked and I decided to make this Eggplant Parmesan Casserole that was on my list of things to try. Whenever I have people over for dinner I always try to make something that I can do most, if not all, of the work beforehand so once the guests arrive, I'm not in the kitchen the entire time. This casserole seemed perfect because I could get everything ready, cover it and leave it in the fridge until it was time to put it in the oven.

After reading the recipe I decided to one and a half the recipe since they said it made a very small amount and I did not want to run out of food. The recipe took a little while just because you had to roast the eggplant for 35-45 minutes first, let it cool, and then make the casserole before baking it for about 50 minutes. This was another time when I wish I owned a mandolin. My slices of eggplants were uneven to say the least but they still turned out ok. If you do not have parchment paper I would recommend getting some. I used foil that I covered with oil but the eggplant still stuck some. Eggplant always gets so flimsy once it's roasted anyway flipping it halfway through was a little frustrating so if you can get the parchment paper it will probably make your life a lot easier.

While the eggplant was roasting I got everything else ready. I mixed the panko bread crumbs, Parmesan cheese, oil and S&P and set aside for later to top the casserole. I also mixed together the ricotta cheese, Parmesan cheese, egg yolks, and S&P. I ended up using a little more cheese (shock) then the recipe called for because in my opinion you can never have enough cheese. I then made the sauce by browning some garlic, adding a can of crushed tomatoes, and tossing in some fresh basil at the very end (easy homemade sauce ever).

Once the eggplant was roasted and cooled, I started layering the casserole. For some reason in my mind I was imaging this dish would be like a noodle-less lasagna with layers of eggplants instead of noodles. This was definitely the wrong way to thing about it. I could not spread out the ricotta mixture like you would with a lasagna because the eggplant is not sturdy enough. I ended up just putting dollops of the mixture around the baking dish and assumed once it was in the oven the cheese was going to melt and spread out anyway. After creating several layers, I put the casserole into the oven for 25 minutes. The recipe called for covering the casserole with foil sprayed with non-stick spray for this part. I'm not sure why spraying the foil was necessary. I guess if you filled your baking dish to the brim and the foil was touching the casserole but mine was not. After the 25 minutes, I sprinkled the panko-parmesan mixture on top, put it back in the oven for another 20-25 minutes until it was golden brown.


I sprinkled a little bit of fresh basil on top for color and we were ready to eat. Laura brought a salad with pears and a balsamic vinaigrette from Whole Foods and I toasted up some garlic bread while the casserole was resting. The casserole was delicious and both Phillip and Laura really enjoyed it. Like the original recipe says, it does not make an enormous amount of food like casseroles typically do so if you are trying to feed more than two I would definitely increase the original recipe. Thanks to Tracey's Culinary Adventures for the great recipe!

09.26.11_Veggie Tart


I came across a picture of a flaky crust covered in roasted vegetables and I thought, "that looks incredible." After reading the recipe and realizing that the roasted vegetables were sitting on top of hummus, it only made me more excited for this dish. The website that had the recipe was unfortunately not in English so I had to improvise a little bit. Thanks to Google Translate most of the work was done for me but apparently not all the words were translatable.  I'm still not sure exactly what was written where it said, "Since humus = BUUUN and vegetables browned in the oven = BUUUUN and tart = BUUN and USOOOR, it is obvious that this tart should be a dream. Non?" Perhaps BUUUUN equals GOOOOD?

Anyway, I got the gist of the recipe and I decided to use store bought hummus instead of making my own like the recipe suggested. On the way to the store I realized that most puff pastry or phyllo dough comes frozen and I had not planned far enough in advance to have time to defrost the dough. We decided that we would use the Pillsbury Crescent Roll dough as a substitute and it would be just as buttery and flaky and delicious.  In the end it was, but getting there was much more difficult than I anticipated.

I really hoped to just pop open the can of dough, put it on a cookie sheet and call it a day. Unfortunately the can of crescent rolls we bought had torn dough inside. I was afraid that the dough wouldn't all cook together into one sheet so I figured I could just ball up the dough, and re-roll it out. This did not work. The dough just sprung back to the original shape and was proving to be quite difficult. After an aggravating 10 minutes or so,  I finally was able to just mash it out with my hands until it was a reasonable size and shape. I put the dough into the oven to bake until it was golden brown.


While the dough was cooking I also roasted the vegetables. We used squash, zucchini, eggplant, and I put tomato and a shallot on my half. I just tossed the veggies with EVOO and S&P before putting them in the oven.  After both the dough and the veggies were ready, I took them out of the oven and spread some hummus (we used Cava Mezze Spicy Hummus from Whole Foods) onto the dough. Phillip and I then topped our own halves. After the mishap with the dough it still turned out super tasty. It was like a make-shift pizza with hummus instead of marinara sauce. And who doesn't love roasted vegetables?! This would be a super easy dish to whip together last minute with whatever vegetables you have lying around that you need to use up before they go bad.

09.19.11_Spinach and Goat Cheese Quiche


Hello everyone! This is Phillip, for once. I'm not much of a cook, unless you want some killer shells and cheese, but Jonathan and I decided that a Spinach Quiche would be a great recipe for me to try. Jonathan found this recipe on Spoon Fork Bacon, and it looked - like all of their dishes do - phenomenal.

I started out by preheating the oven to 425 degrees and grabbing a mixing bowl. All the ingredients will end up in this bowl, so you might as well get a large one. The recipe calls for three full eggs and two egg whites. If anyone is watching you do this, it is extremely vital that you crack the eggs with one hand, so that you look as cool as possible. After the eggs, I mixed in 2/3 cup milk and 1/3 cup heavy cream, some S&P, and whisked it until everything mixed together.
Back off Morimoto, I got this.
My happy helper Jonathan sliced half of a red pepper and grated a cup of Fontina cheese while I sauteed the spinach in olive oil with some salt and pepper. You need about a full cup of cooked spinach, which came out to three or four handfuls of fresh spinach. After I cooked the spinach, I used my hands to wring out the excess liquid. Using my rockstar knife skills, I chopped up the spinach and set it aside.

The pie crust I used was a frozen 9" Whole Foods crust that we thawed in the fridge overnight. Jonathan placed his peppers in the bottom of the crust while I spread around my chopped spinach on top of the peppers. Back to the mixing bowl, I added a tbsp of minced thyme with the Fontina cheese, gave it a quick stir and poured the entire mixture into the pie crust. Jonathan crumbled
some goat cheese on top, and it fit perfectly in the 9" crust.

I was a little paranoid about spills, so I put the quiche on a baking sheet before putting it in the oven. After baking for 20 minutes, I turned the oven down to 375. I peeked to make sure it hadn't overflowed or exploded, but thankfully everything looked fine. After 25 more minutes at 375, I pulled the quiche out of the oven and let it set for another 10 minutes to let it cool down and settle. I washed a bowl of grapes for our side, and we were ready to eat!

Overall, I'd call this a huge personal victory. It tasted delicious and was a huge step up from anything I think I've ever made before. The only change I made to the recipe was that I cooked it for five minutes longer on 375 than suggested and used skim milk instead of whole. In retrospect, I would have used a little less thyme. Even though it is one of my favorite spices, it seemed to take over the dish. I hope to have many more successes to share with you all in the future!


09.18.11_Homemade Whole Wheat Ravioli


I have always wanted to try and make my own pasta but I never have felt a need to buy a pasta maker. Since I do not have the pasta maker to evenly cut out long strands for linguine or anything like that, I thought ravioli would be a good idea because I could just roll the dough out by hand and if it came out somewhat "rustic" it would be fine. The recipe that I actually found was for whole wheat pasta (which doesn't contain egg) so I thought this would be another good dish to have with Caitlin. She was coming over for dinner on Sunday so I thought this would be a good opportunity to make them since I would have all day to figure it out.

I ended up using a few different recipes for my ravioli. The original recipe that I found said that they did not like the filling they used and the sauce didn't really appeal to me (it looked like a paste they spread on top of the ravioli). So I decided I would use the original recipe for the dough, and then find another recipe for the filling and sauce. I just looked on Food Network for "Butternut Squash Ravioli" and came across Emeril's recipe for Ravioli and Sage Brown Butter.
Before tackling the dough, I quickly sauteed one shallot in olive oil (instead of butter for Caitlin) with some S&P before adding a package of the defrosted squash puree I bought at the store. I cooked for a couple of minutes, added some nutmeg, and then let the mixture cool completely while I was making the dough. The dough was super easy to make. Just mix the all-purpose and whole wheat flower together with some S&P and a little garlic and/or onion powder. I sifted the all-purpose flour to get rid of any clumps but when I sifted the whole wheat flour, all the little brown flecks of what I'm assuming were the wheat were left in the sifter. I ended up dumping those back into the mixture since I did not want to separate out the wheat! Then add in the wet ingredients which were just water and I added a tablespoon of maple syrup for sweetener. I had to add a little more water than the recipe called for to get all the ingredients combined and at a good consistency.

Next came the tricky part. My tiny kitchen really does not allow room for big projects like this and I also did not have a very big cutting board so I was really tight for space. I split the dough in half and rolled the first half out on a floured cutting board. I had to open the rolling pin my sister had given me a few years back since I had never used it (have I mentioned I don't back much?). After the dough was rolled out to the size of my cutting board I spooned on tablespoon of the squash mixture onto the dough. I managed to fit three rows of four on the dough, leaving about an inch in between each blob of filling.


Next, I wet my finger and drew a grid around the filling scoops so that when I laid the other layer of dough on top they would stick together. I rolled out the second half of the dough on another cutting board and when it seemed as big as the other piece of dough, I used my rolling pin to pick up the dough and gently laid it on top of the dough with the filling on top. I then took my finger and run it around all the spoonfuls of squash mixture and pressed the doughs together. I used a pizza cutter to cut the ravioli into squares and tossed the leftover dough back into my mixing bowl. I used a fork to crimp all the edges to keep the ravioli together and to make it look pretty and homemade. I then used the leftover dough to make a few extra ravioli. I ended up with 14 ravioli, but they were pretty big.

I prepared the ravioli earlier in the day an then covered them with plastic wrap until Caitlin came over. When we were ready to eat I brought a big pot of water to a boil and dropped the ravioli in. The ravioli cooked for about 4 minutes or so before I strained them in a colander. While the water was coming to a boil, I made the Sage Brown Butter for me and Phillip. I melted a stick of butter, added 12 leaves of sage, and just let it cook until it became brown, stirring occasionally.


I was really impressed with how the ravioli came out. None of them fell apart while cooking or being drained and they tasted delicious. It definitely took some time but it was fun to make my own pasta from scratch and I'd like to try it again and make regular pasta. I served the ravioli with garlic bread and a side salad. The salad consisted of spinach leaves, candied walnuts, and grapes. Yum! Caitlin and I used my favorite Raspberry Walnut Vinaigrette and I made a Apple Cider Vinaigrette for Phillip. If you are looking for a fun weekend project I would definitely recommend trying to make your own pasta!

09.16.11_Poached Eggs on Ricotta Toast


Poached eggs is another one of those things that always scared me to try. I don't know why but the idea of just dropping an egg into almost boiling water seemed like a situation where a lot could go wrong. After my successful attempts at other dishes that scared me (aka the gnocchi and the risotto) I decided it was time to conquer my fears of poached eggs. Trusty Rachael Ray had just posted a recipe for Poached Eggs on Ricotta Toast from her magazine and since she has not led me astray yet, I decided to use her recipe (the delicious pictures didn't hurt either).

I felt like I had watched enough Food Network and Top Chef to know the basics. I had always seen/heard that you should spin the water before dropping the egg and that adding vinegar will help the egg coagulate faster and more cohesively. Being the worrier that I am, I did some research on poaching eggs and found most reviews saying that the vinegar was really not necessary and would change the flavor of the eggs. I also did not want to poach the eggs one at a time so I would not be able to spin the water or else all the eggs would collide and merge into one monstrous poached egg. I decided to throw everything I thought I knew about poaching eggs to the wind and just had to go for it!

Before attempting my first poach, I got everything else ready. I had read on multiple blogs and websites that the time it takes to poach the eggs goes fast so you should have everything else ready first. Ray Ray's recipe called for steamed asparagus but I do not have a steamer. I Googled "how to steam asparagus without a steamer" and came across this handy video. All I had to do was add a little water to a pan and add the asparagus after the water starts to simmer. Super simple. While the asparagus was "steaming" I toasted up the bread and spread the ricotta onto the toast. We decided to leave the bacon out of the recipe so that it would be a vegetarian dish. I put four pieces of asparagus onto each toast and then the time had come to poach the eggs.

Perfectly runny yolk! Just the way I like it!
Instead of using a big pot I used a deep-sided skillet for poaching the eggs. I thought this would be easier to keep track of the eggs since I was poaching four. I got the water to just below a boil and cracked the first egg into a small Pyrex bowl. I dropped the egg into the water and watched anxiously as the egg started to cook. I repeated the process and was able to fit three eggs into the pan comfortably. I probably could have fit the fourth but didn't want to push my luck. Each egg cooked just enough before adding the next egg so they would not stick together. In the end we have four pretty poached eggs for our toast and I managed not to pop any of the yolks in the process.  I served the Ricotta Toasts with some orange wedges and called it a day on our breakfast for dinner.

09.12.11_Falafel Burgers


Phillip and I had falafel several times throughout our month of vegetarianism, our first night, and at Lebanese Taverna to name two, but it was definetiely something we both enjoyed. I came across this recipe for Rachael Ray's Falafel Burgers and I thought this would be a fun new way to eat falafel. I also had not made falafel from scratch so I was excited to see that the recipe did not use the box mix.

Making the "batter" was super simple. All I had to do was combine the ingredients (chickpeas, red onion, garlic, flour, cumin, coriander, chili powder, turmeric, and S&P) in a food processor.  I left out the parsley because I didn't have fresh and decided there were enough flavors going on already with all the spices. After all the ingredients were evenly mixed I divided the mixture into four even portions and formed them into patties.

The patties right after they came out of the skillet, top with cucumber slices.
The burgers cooked in oil in a skillet for a few minutes on each side. The recipe calls for 3 minutes on each side. I probably did a little bit longer hoping to get a bit more of a crust on the burgers. We served the burgers in pita with sliced cucumber and instead of the tahini sauce Rachael made we just used store bought spicy hummus. The burgers tasted just like falafel and were just as delicious the next day for lunch. I ate my leftovers on one of the Pepperidge Farm Deli Flats rather than the pita because the pita was so thin it kept falling apart on me during dinner. The Deli Flats tasted just as good though, if not better in my opinion!

09.10.11_Aloo Gobi Chana


During our month of vegetarianism we had made multiple Indian dishes, the Paneer Tika Masala and the Vegetable Curry. When I found the recipe for the Tika Masala I also looked up other Indian dishes that may be good. I came across a recipe for for Aloo Gobi (potatoes and cauliflower), another one of Aarti Sequeria's recipes. I ended up not making it during the month of August since I had so many other recipes I wanted to try, but kept it on our list of recipes to make at some point.  Caitlin just moved into her new apartment on Saturday and I thought this would be a perfect opportunity to try this recipe since it was vegan and could serve as a housewarming gift for her.

This was honestly one of the easiest and quickest recipes I've ever made. First, mix the spices and water together to make the masala (spice mix). Then saute a serano pepper in some oil with cumin seeds. Add the masala and cook for a few minutes. Finally, mix in the potatoes, cauliflower, and water until everything is well mixed and the potatoes and cauliflower are completely coated. Cook for 20 minutes and that's it!
Doing our part to end Breast Cancer
I only made two modifications to this recipe. I decided to add chickpeas to the mix to make it a little more hearty, and I also used frozen cauliflower instead of fresh (we still had cauliflower leftover from when we made the Vegetable Curry). I served the Aloo Gobi, now Aloo Gobi Chana because of the addition of the chickpeas, with basmati rice and garlic naan. We celebrated Caitlin's move with a bottle of champagne and by eating Indian food while sitting on the floor, because she didn't have any of her furniture yet. Super classy.

Caitlin and Phillip enjoying some Indian on the floor.

09.06.11_Spinach Lasagna with Bechamel Sauce


And we're back! After a week away we decided it was time to start back up on the blog! The past week has been a little bit of a roller coaster. The first couple of days I made some poor decisions about the type of foods I decided to eat. Our first meal back I really wanted a buffalo chicken sandwich but the bar we were having Happy Hour at had this special for chicken tenders. I ended up getting those with a side of hot sauce. The deep-fried chicken and greasy french fries was probably not the best way to reintroduce myself to meat. I felt terrible after. I highly doubt it was the chicken but it was still not a great first experience. The next day we were hanging out with our friend Amanda and we all decided to get McDonald's for dinner. Classy I know. Once again, not a great decision. Since then I would say about half of my meals have been vegetarian. I think I will continue to eat a lot of vegetarian meals but have meat every once in a while or for special occasions.

For our first blog post after our hiatus I decided to make a Spinach Lasagna with Bechamel Sauce. I felt like I had tried all kinds of new things in August so this would be a yummy dish that we were familiar with and who doesn't love lasagna? I had made this lasagna several years ago in college and decided I would try to just recreate it from memory. I looked up a general recipe for lasagna to make sure I bought enough ricotta, mozzarella, etc, but then the rest I just kind of made up (for the actual measurements and ingredients I used see the end of the post). I always forget how much work a lasagna can be because once it's all done its in one dish, but you forget how many pots and pans you dirty to get there, especially if you are making your own sauce!
To start I put a big pot of water on the stove for the noodles. While waiting for the water to boil, I started making the bechamel sauce which is basically just a normal white sauce. To make the sauce you first have to make a roux, which is just a mixture of equal parts butter and flour. I melted butter in a sauce pan and slowly whisked in the flour. After cooking the roux to get rid of the flour taste, I slowly added the milk. Once it was a good consistency, I seasoned with fresh nutmeg and S&P.

While the noodles were boiling, I sauteed half an onion and two cloves of garlic in a little bit of EVOO. In a separate bowl I combined a package of ricotta cheese, two eggs, a handful of mozzarella cheese and about a palm-full of Parmesan cheese. I then added the onion and garlic mixture as well as one packaged of frozen spinach that I had defrosted and squeezed all of the liquid out of. I zested a lemon, squeezed half the juice into the cheese mixture, and added S&P to season the mixture.

Once the noodles had cooked for about 12 minutes I started to layer my lasagna. First a little bit of the bechamel sauce on the bottom of the baking dish. Then a layer of lasagna noodles. I topped the noodles with a third of the cheese mixture and spread it out evenly. Finally a layer of the bechamel sauce top with a sprinkling of mozzarella cheese. I repeated this three times and then topped with another layer of noodles, a layer of the bechamel and finally the rest of the bag of mozzarella cheese.  The lasagna went into a 350 degree oven for an hour and came out golden brown on top. The next time I make this recipe again I would only zest half of the lemon or leave out the lemon juice and consider adding a little more spinach.


Bechamel Sauce Ingredients
2/3 stick of butter
2/3 cup of flour
4 cups milk
Salt and pepper
Freshly grated nutmeg to taste

Lasagna Ingredients
1 box lasagna noodles
1 box frozen spinach (defrosted and drained)
1 package ricotta cheese (15 oz)
1 cup Parmesan cheese
4 cups shredded mozzarella cheese
1 lemon
2 eggs
2 cloves garlic
Half a medium onion or one shallot
Salt and pepper
Extra-Virgin Olive Oil

08.31.11_Vegetarian Paella

Lightlife's Vegetarian Paella with "Chorizo"
I cannot believe how quickly this month has gone. When Phillip drunkenly suggested going vegetarian for a month at the Britney concert I thought there was no way we would actually keep it up and complete the entire month. I am really proud of us, especially Phillip, for trying so many new things and surviving without meat for an 31 days! For our last meal of the month I wanted to make this vegetarian paella. Lightlife, one of the companies that makes the vegetarian "meats" had tweeted out this recipe a few weeks ago and since the woman who tweets and blogs for Lightlife has been supportive of the blog and our efforts, I thought it would be fitting to end with one of her dishes.

 I originally was going to leave out the Lightlife Chorizo but Phillip really wanted it so I left it in for him. I had never made paella before but new that it couldn't be too difficult since its typically just rice, seasoning, and either seafood or vegetables. Over the course of this month I have bought big bags of jasmine, basmati, and arborio rice so I did not want to also buy a bag of long-grain brown rice. Brown rice also takes FOREVER to cook so I decided to sub arborio rice instead since I still had about half the bag left from when I made the butternut squash risotto. Since I was using a different type of rice, I followed the instructions on the bag for how much vegetable stock to use rather than following the recipe.

Once I sauteed a little bit of onion and garlic, coated the rice with olive oil, and added the stock, I started chopping all the vegetables and the "chorizo." I used yellow and orange bell peppers since it was what I had. After everything was chopped, I sauteed the rest of the onion, the peppers, the chorizo and added the spices with the wine. I had fresh thyme leftover from the gnocchi with butter thyme sauce so I used that, but used dried oregano and regular paprika rather than smoked because again, it's what I had on hand. I made the executive decision to leave the saffron out because it is so freaking expensive and I felt like there would be enough flavor from all the other ingredients.

I cooked the rice a few minutes short of the 20 minutes it takes to cook since it would continue to cook when I put it into the oven. The pot I made the rice in was not oven-safe so I transferred the rice and all the vegetables into CorningWare before putting in the oven. After 10 minutes, I added the sugar snap peas, popped it back in the oven for another 10-15 minutes and then it was ready. The dish was super flavorful and Phillip really appreciated having the "chorizo" in the dish. I loved the addition of the sugar snap peas because of the crunch they added to the dish.


Thank you to all of the people who have supported us this month and to those who have read the blog. I am still shocked by the number of views there were over the past couple weeks and the overwhelmingly positive response we have received from our friends, family, and twitter followers. Phillip and I plan on incorporating multiple vegetarian meals into our diet each week and I hope to put up a few posts per week rather than the daily posts. Maybe one day we will fully convert, but for now, I am really looking forward to my Buffalo Chicken sandwich at Happy Hour tonight and I know Phillip has been craving cheeseburger for days now! Thanks again!

08.30.11_Zucchini Tacos and Black Bean Soup


Yesterday was our One Year Anniversary and we are going to be celebrating this weekend with a trip to Charlottesville. For something special on the actual day we decided to just have a low-key night with wine and cheese on our rooftop before cooking one of our last vegetarian dinners. Our first date was at a Mexican restaurant called Surfside in Glover Park. I decided to make Zucchini Tacos and Black Bean Soup to somewhat recreate our first date. I was actually surprised with how many different things I needed to do for these recipes (lots of prep work) and I didn't even make the tomatillo salsa that the taco recipe recommended! When it was all said and done we had a sweet corn succotash, grilled zucchini tacos, and black bean soup.

I made the sweet corn succotash first since it could just sit and the flavors would just marry the longer it sat. It was easy enough. Just saute onion, garlic, jalapeno, and bell pepper for a few minutes before adding the corn. The recipe called for fresh corn but I had a can of corn on hand so I just drained it and used that instead. I also squeezed a little fresh lime into the mix to brighten the flavors a bit. After the succotash was made it was onto the black bean soup. This had to simmer for about 15 minutes so I figured I could grill up the zucchini and squash for the tacos once the soup was simmering.
I had originally found a recipe for black bean soup on a vegan blog and had bookmarked it without really looking at the ingredients. After reading it on Monday it had all kinds of things that I did not have so I decided to go back to trusty Rachael Ray and get an easier recipe with things I would most likely have at home or easily be able to find at the grocery store. Her recipe called for black beans, celery, onion, bell pepper, and a can of diced tomatoes, seasoned with bay leaves, cumin, coriander, S&P, and hot sauce cooked in vegetable stock. I decided to leave out the tomatoes for Phillip so I added a little extra stock to make up for the liquid that was lost by omitting the tomatoes. Other than a lot of prep this recipe was easy as Ray Ray's recipes always are. I'm not sure why she calls it a stoup though. I know she loves making stoups because she thinks she's clever for combing the words soup and stew but this was definitely more soup-like. If I were to make this again I would cut back on the celery. It seemed more like a Tex-Mex vegetable soup than an actual black bean soup like I wanted.

Black Bean Soup, Sweet Corn Succotash, and Grilled Zucchini and Squash for the Tacos
Once the soup was simmering I sliced up the zucchinis and squash into long planks. Having a mandolin would have made this much easier and the size of the planks more consistent. Obviously cutting them with a knife worked fine but my slices were inconsistent to say the least. After slicing all I had to do was brush each side with olive oil and season with S&P before throwing them on the grill pan. A couple of minutes later dinner was ready. I also put out salsa, cheese and lime wedges to top the tacos with. The zucchini tacos were delicious and I did not miss the meat at all. All the vegetables were super juicy so they were a little messy to eat but well worth it.