Showing posts with label food. Show all posts

09.19.11_Spinach and Goat Cheese Quiche


Hello everyone! This is Phillip, for once. I'm not much of a cook, unless you want some killer shells and cheese, but Jonathan and I decided that a Spinach Quiche would be a great recipe for me to try. Jonathan found this recipe on Spoon Fork Bacon, and it looked - like all of their dishes do - phenomenal.

I started out by preheating the oven to 425 degrees and grabbing a mixing bowl. All the ingredients will end up in this bowl, so you might as well get a large one. The recipe calls for three full eggs and two egg whites. If anyone is watching you do this, it is extremely vital that you crack the eggs with one hand, so that you look as cool as possible. After the eggs, I mixed in 2/3 cup milk and 1/3 cup heavy cream, some S&P, and whisked it until everything mixed together.
Back off Morimoto, I got this.
My happy helper Jonathan sliced half of a red pepper and grated a cup of Fontina cheese while I sauteed the spinach in olive oil with some salt and pepper. You need about a full cup of cooked spinach, which came out to three or four handfuls of fresh spinach. After I cooked the spinach, I used my hands to wring out the excess liquid. Using my rockstar knife skills, I chopped up the spinach and set it aside.

The pie crust I used was a frozen 9" Whole Foods crust that we thawed in the fridge overnight. Jonathan placed his peppers in the bottom of the crust while I spread around my chopped spinach on top of the peppers. Back to the mixing bowl, I added a tbsp of minced thyme with the Fontina cheese, gave it a quick stir and poured the entire mixture into the pie crust. Jonathan crumbled
some goat cheese on top, and it fit perfectly in the 9" crust.

I was a little paranoid about spills, so I put the quiche on a baking sheet before putting it in the oven. After baking for 20 minutes, I turned the oven down to 375. I peeked to make sure it hadn't overflowed or exploded, but thankfully everything looked fine. After 25 more minutes at 375, I pulled the quiche out of the oven and let it set for another 10 minutes to let it cool down and settle. I washed a bowl of grapes for our side, and we were ready to eat!

Overall, I'd call this a huge personal victory. It tasted delicious and was a huge step up from anything I think I've ever made before. The only change I made to the recipe was that I cooked it for five minutes longer on 375 than suggested and used skim milk instead of whole. In retrospect, I would have used a little less thyme. Even though it is one of my favorite spices, it seemed to take over the dish. I hope to have many more successes to share with you all in the future!


09.16.11_Poached Eggs on Ricotta Toast


Poached eggs is another one of those things that always scared me to try. I don't know why but the idea of just dropping an egg into almost boiling water seemed like a situation where a lot could go wrong. After my successful attempts at other dishes that scared me (aka the gnocchi and the risotto) I decided it was time to conquer my fears of poached eggs. Trusty Rachael Ray had just posted a recipe for Poached Eggs on Ricotta Toast from her magazine and since she has not led me astray yet, I decided to use her recipe (the delicious pictures didn't hurt either).

I felt like I had watched enough Food Network and Top Chef to know the basics. I had always seen/heard that you should spin the water before dropping the egg and that adding vinegar will help the egg coagulate faster and more cohesively. Being the worrier that I am, I did some research on poaching eggs and found most reviews saying that the vinegar was really not necessary and would change the flavor of the eggs. I also did not want to poach the eggs one at a time so I would not be able to spin the water or else all the eggs would collide and merge into one monstrous poached egg. I decided to throw everything I thought I knew about poaching eggs to the wind and just had to go for it!

Before attempting my first poach, I got everything else ready. I had read on multiple blogs and websites that the time it takes to poach the eggs goes fast so you should have everything else ready first. Ray Ray's recipe called for steamed asparagus but I do not have a steamer. I Googled "how to steam asparagus without a steamer" and came across this handy video. All I had to do was add a little water to a pan and add the asparagus after the water starts to simmer. Super simple. While the asparagus was "steaming" I toasted up the bread and spread the ricotta onto the toast. We decided to leave the bacon out of the recipe so that it would be a vegetarian dish. I put four pieces of asparagus onto each toast and then the time had come to poach the eggs.

Perfectly runny yolk! Just the way I like it!
Instead of using a big pot I used a deep-sided skillet for poaching the eggs. I thought this would be easier to keep track of the eggs since I was poaching four. I got the water to just below a boil and cracked the first egg into a small Pyrex bowl. I dropped the egg into the water and watched anxiously as the egg started to cook. I repeated the process and was able to fit three eggs into the pan comfortably. I probably could have fit the fourth but didn't want to push my luck. Each egg cooked just enough before adding the next egg so they would not stick together. In the end we have four pretty poached eggs for our toast and I managed not to pop any of the yolks in the process.  I served the Ricotta Toasts with some orange wedges and called it a day on our breakfast for dinner.

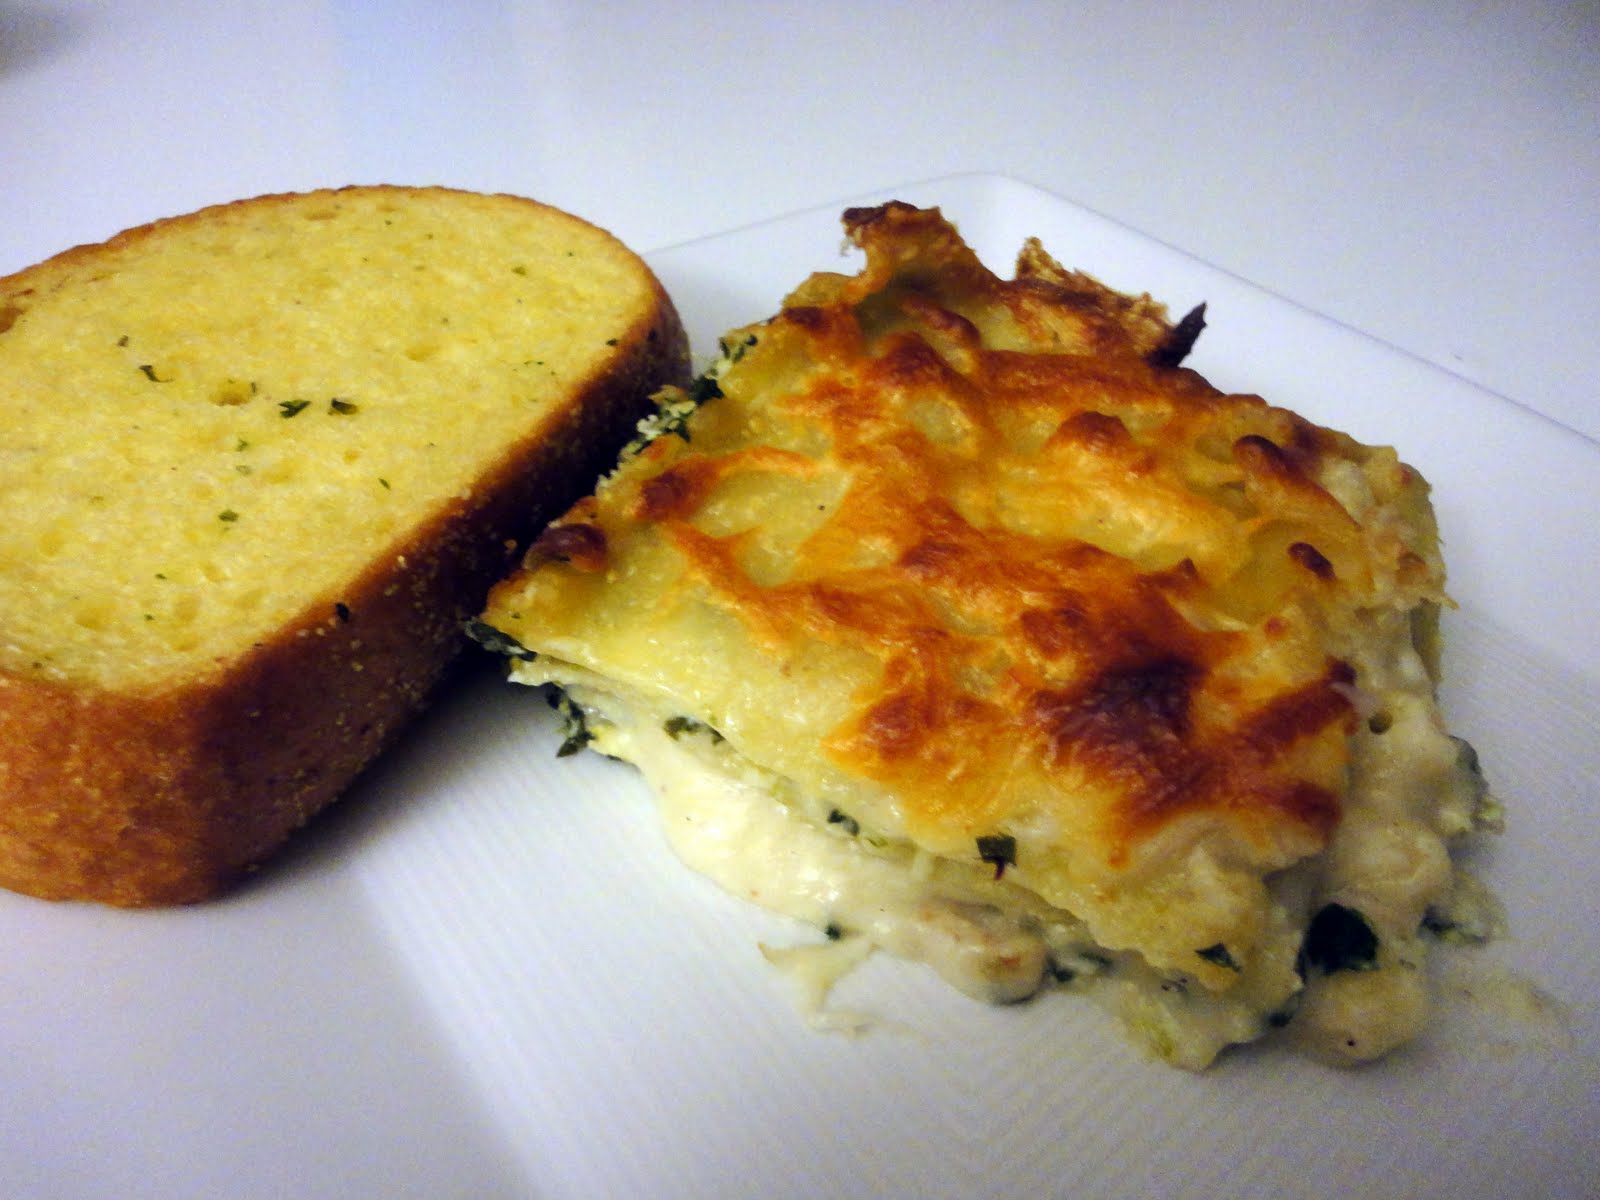
09.06.11_Spinach Lasagna with Bechamel Sauce


And we're back! After a week away we decided it was time to start back up on the blog! The past week has been a little bit of a roller coaster. The first couple of days I made some poor decisions about the type of foods I decided to eat. Our first meal back I really wanted a buffalo chicken sandwich but the bar we were having Happy Hour at had this special for chicken tenders. I ended up getting those with a side of hot sauce. The deep-fried chicken and greasy french fries was probably not the best way to reintroduce myself to meat. I felt terrible after. I highly doubt it was the chicken but it was still not a great first experience. The next day we were hanging out with our friend Amanda and we all decided to get McDonald's for dinner. Classy I know. Once again, not a great decision. Since then I would say about half of my meals have been vegetarian. I think I will continue to eat a lot of vegetarian meals but have meat every once in a while or for special occasions.

For our first blog post after our hiatus I decided to make a Spinach Lasagna with Bechamel Sauce. I felt like I had tried all kinds of new things in August so this would be a yummy dish that we were familiar with and who doesn't love lasagna? I had made this lasagna several years ago in college and decided I would try to just recreate it from memory. I looked up a general recipe for lasagna to make sure I bought enough ricotta, mozzarella, etc, but then the rest I just kind of made up (for the actual measurements and ingredients I used see the end of the post). I always forget how much work a lasagna can be because once it's all done its in one dish, but you forget how many pots and pans you dirty to get there, especially if you are making your own sauce!
To start I put a big pot of water on the stove for the noodles. While waiting for the water to boil, I started making the bechamel sauce which is basically just a normal white sauce. To make the sauce you first have to make a roux, which is just a mixture of equal parts butter and flour. I melted butter in a sauce pan and slowly whisked in the flour. After cooking the roux to get rid of the flour taste, I slowly added the milk. Once it was a good consistency, I seasoned with fresh nutmeg and S&P.

While the noodles were boiling, I sauteed half an onion and two cloves of garlic in a little bit of EVOO. In a separate bowl I combined a package of ricotta cheese, two eggs, a handful of mozzarella cheese and about a palm-full of Parmesan cheese. I then added the onion and garlic mixture as well as one packaged of frozen spinach that I had defrosted and squeezed all of the liquid out of. I zested a lemon, squeezed half the juice into the cheese mixture, and added S&P to season the mixture.

Once the noodles had cooked for about 12 minutes I started to layer my lasagna. First a little bit of the bechamel sauce on the bottom of the baking dish. Then a layer of lasagna noodles. I topped the noodles with a third of the cheese mixture and spread it out evenly. Finally a layer of the bechamel sauce top with a sprinkling of mozzarella cheese. I repeated this three times and then topped with another layer of noodles, a layer of the bechamel and finally the rest of the bag of mozzarella cheese.  The lasagna went into a 350 degree oven for an hour and came out golden brown on top. The next time I make this recipe again I would only zest half of the lemon or leave out the lemon juice and consider adding a little more spinach.


Bechamel Sauce Ingredients
2/3 stick of butter
2/3 cup of flour
4 cups milk
Salt and pepper
Freshly grated nutmeg to taste

Lasagna Ingredients
1 box lasagna noodles
1 box frozen spinach (defrosted and drained)
1 package ricotta cheese (15 oz)
1 cup Parmesan cheese
4 cups shredded mozzarella cheese
1 lemon
2 eggs
2 cloves garlic
Half a medium onion or one shallot
Salt and pepper
Extra-Virgin Olive Oil

08.31.11_Vegetarian Paella

Lightlife's Vegetarian Paella with "Chorizo"
I cannot believe how quickly this month has gone. When Phillip drunkenly suggested going vegetarian for a month at the Britney concert I thought there was no way we would actually keep it up and complete the entire month. I am really proud of us, especially Phillip, for trying so many new things and surviving without meat for an 31 days! For our last meal of the month I wanted to make this vegetarian paella. Lightlife, one of the companies that makes the vegetarian "meats" had tweeted out this recipe a few weeks ago and since the woman who tweets and blogs for Lightlife has been supportive of the blog and our efforts, I thought it would be fitting to end with one of her dishes.

 I originally was going to leave out the Lightlife Chorizo but Phillip really wanted it so I left it in for him. I had never made paella before but new that it couldn't be too difficult since its typically just rice, seasoning, and either seafood or vegetables. Over the course of this month I have bought big bags of jasmine, basmati, and arborio rice so I did not want to also buy a bag of long-grain brown rice. Brown rice also takes FOREVER to cook so I decided to sub arborio rice instead since I still had about half the bag left from when I made the butternut squash risotto. Since I was using a different type of rice, I followed the instructions on the bag for how much vegetable stock to use rather than following the recipe.

Once I sauteed a little bit of onion and garlic, coated the rice with olive oil, and added the stock, I started chopping all the vegetables and the "chorizo." I used yellow and orange bell peppers since it was what I had. After everything was chopped, I sauteed the rest of the onion, the peppers, the chorizo and added the spices with the wine. I had fresh thyme leftover from the gnocchi with butter thyme sauce so I used that, but used dried oregano and regular paprika rather than smoked because again, it's what I had on hand. I made the executive decision to leave the saffron out because it is so freaking expensive and I felt like there would be enough flavor from all the other ingredients.

I cooked the rice a few minutes short of the 20 minutes it takes to cook since it would continue to cook when I put it into the oven. The pot I made the rice in was not oven-safe so I transferred the rice and all the vegetables into CorningWare before putting in the oven. After 10 minutes, I added the sugar snap peas, popped it back in the oven for another 10-15 minutes and then it was ready. The dish was super flavorful and Phillip really appreciated having the "chorizo" in the dish. I loved the addition of the sugar snap peas because of the crunch they added to the dish.


Thank you to all of the people who have supported us this month and to those who have read the blog. I am still shocked by the number of views there were over the past couple weeks and the overwhelmingly positive response we have received from our friends, family, and twitter followers. Phillip and I plan on incorporating multiple vegetarian meals into our diet each week and I hope to put up a few posts per week rather than the daily posts. Maybe one day we will fully convert, but for now, I am really looking forward to my Buffalo Chicken sandwich at Happy Hour tonight and I know Phillip has been craving cheeseburger for days now! Thanks again!

08.30.11_Zucchini Tacos and Black Bean Soup


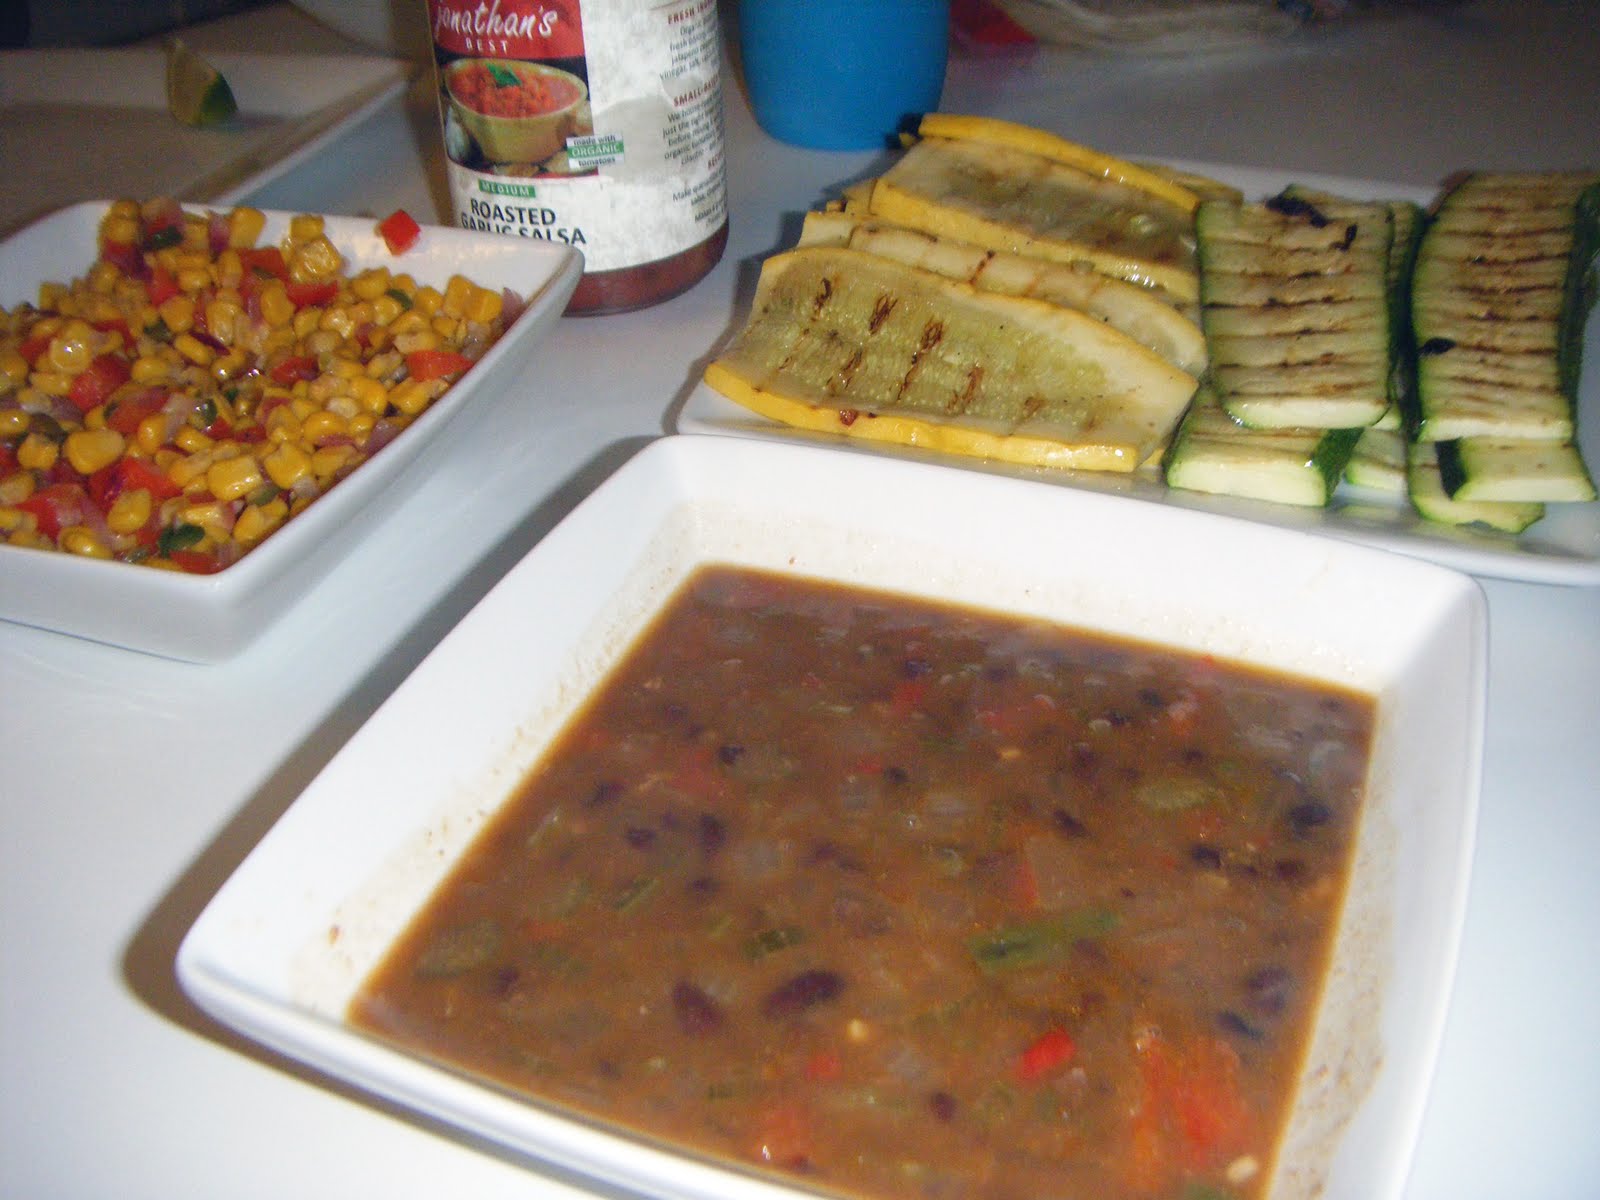
Yesterday was our One Year Anniversary and we are going to be celebrating this weekend with a trip to Charlottesville. For something special on the actual day we decided to just have a low-key night with wine and cheese on our rooftop before cooking one of our last vegetarian dinners. Our first date was at a Mexican restaurant called Surfside in Glover Park. I decided to make Zucchini Tacos and Black Bean Soup to somewhat recreate our first date. I was actually surprised with how many different things I needed to do for these recipes (lots of prep work) and I didn't even make the tomatillo salsa that the taco recipe recommended! When it was all said and done we had a sweet corn succotash, grilled zucchini tacos, and black bean soup.

I made the sweet corn succotash first since it could just sit and the flavors would just marry the longer it sat. It was easy enough. Just saute onion, garlic, jalapeno, and bell pepper for a few minutes before adding the corn. The recipe called for fresh corn but I had a can of corn on hand so I just drained it and used that instead. I also squeezed a little fresh lime into the mix to brighten the flavors a bit. After the succotash was made it was onto the black bean soup. This had to simmer for about 15 minutes so I figured I could grill up the zucchini and squash for the tacos once the soup was simmering.
I had originally found a recipe for black bean soup on a vegan blog and had bookmarked it without really looking at the ingredients. After reading it on Monday it had all kinds of things that I did not have so I decided to go back to trusty Rachael Ray and get an easier recipe with things I would most likely have at home or easily be able to find at the grocery store. Her recipe called for black beans, celery, onion, bell pepper, and a can of diced tomatoes, seasoned with bay leaves, cumin, coriander, S&P, and hot sauce cooked in vegetable stock. I decided to leave out the tomatoes for Phillip so I added a little extra stock to make up for the liquid that was lost by omitting the tomatoes. Other than a lot of prep this recipe was easy as Ray Ray's recipes always are. I'm not sure why she calls it a stoup though. I know she loves making stoups because she thinks she's clever for combing the words soup and stew but this was definitely more soup-like. If I were to make this again I would cut back on the celery. It seemed more like a Tex-Mex vegetable soup than an actual black bean soup like I wanted.

Black Bean Soup, Sweet Corn Succotash, and Grilled Zucchini and Squash for the Tacos
Once the soup was simmering I sliced up the zucchinis and squash into long planks. Having a mandolin would have made this much easier and the size of the planks more consistent. Obviously cutting them with a knife worked fine but my slices were inconsistent to say the least. After slicing all I had to do was brush each side with olive oil and season with S&P before throwing them on the grill pan. A couple of minutes later dinner was ready. I also put out salsa, cheese and lime wedges to top the tacos with. The zucchini tacos were delicious and I did not miss the meat at all. All the vegetables were super juicy so they were a little messy to eat but well worth it.

08.29.11_Pineapple Pizza and Homemade Cheesy Bread


After getting very little sleep on Sunday night I was not in the mood to make some elaborate meal. We had decided to do something easy and I contemplated ordering from the Homemade Pizza Company but then realized I could make the same thing for $5. Since we had loved the pineapple pizza so much when we ordered it while visiting Caitlin in Fredericksburg, we decided to make one ourselves. I decided to also make cheesy bread since I had already had a pizza post on the blog and to try something different.

We planned on going to the grocery store after work to get all the ingredients for the next couple of meals. I could not believe how empty that grocery store was in the aftermath of the hurricane. I know people were worried about losing power and such but I could not get over just how empty the store was. What was really funny was which items were completely gone. A lot of produce was down to the last few pieces and things like cheese, vegetable stock, and some of the vegetarian meat substitutes were gone. How are these things going to help you in a hurricane? I don't get it. I thought you should buy nonperishable items? Not tofu and a block of cheddar cheese?
Once we got back I started working on the cheesy bread. I just Googled cheesy bread and came across a recipe that had a ton of pictures (which I like) so decided on that one. All you had to do was melt some butter in a pan and saute a few cloves of garlic. Then you cut a baguette in half in both directions to end up with four pieces of flat bread. Rub the bread, flat-side-down, in the butter and garlic for a bit to toast it up and let it absorb the butter and garlic. In a bowl combine cheddar, Monterrey jack, and Parmesan cheese with some mayo, and green onion (I left this out for Phillip but added oregano instead). Spread the mixture on top of the bread and then stick it in the oven for 10 minutes. Even with the mayo, Phillip enjoyed it.

Homemade Cheesy Bread
As for the pizza, it was the same as always. I used one of the packages from Kroger that I hoard for situations like this, added sauce and mozzarella, and then topped with pineapple from a can. I drained the pineapple and then patted the chunks dry before putting them on the pizza so that it wouldn't get soggy from the pineapple. The pizza takes the same amount of time as the cheesy bread so 10 minutes later we had pineapple pizza and homemade cheesy bread. Delish.

08.28.11_Alex's Falafel

Our friend Alex invited us over for dinner on Sunday night. She had been wanting to make falafel from scratch and thought this would be a good opportunity since we had gone vegetarian for the month. When we got over to her apartment she had already made homemade pita bread, a sauce (made of greek yogurt, paprika, and roasted red pepper), Bobby Flay's white bean hummus, and a greek salad (cucumber tomato, red onion, and feta over mixed greens). She soaked the chickpeas and then used her Cuisinart to mix all the ingredients for the falafel. Everything was delicious. Having made the falafel from the box myself on our first day of our vegetarian adventure, I'm not sure if it's worth all the effort to make it from scratch. It looked like a lot of effort to me for a very similar result. Granted, I do not have a jumbo Cuisinart so it definitely would have been even more of an effort for me to make tiny batches of the mixture before frying the falafel balls. It was a fun time and nice to get out of the apartment for a bit after being cooped up all day during the hurricane. Thanks Alex!

08.27.11_Bua Thai

In case you live under a rock and were unaware, the east coast had quite the week in terms of natural disasters. After the earthquake on Tuesday, we had the hurricane to look forward to for the weekend. Based on the weather reports, people were panicking, per usual, and stocking up as if the world was literary about to end. Phillip and I didn't really do anything to prepare, besides filling up one extra pitcher of water, just in case we really underestimated the situation. Turns out, we didn't. Our power luckily stayed on the entire time and while we got a lot of rain, it really wasn't anything exciting. There was some water damage in our hallway but nothing in our apartment.

Saturday night we had planned on going out to dinner for a friend's birthday but because of Irene they ended up not coming into town. I had not bought groceries for a meal and Phillip had gone to try and buy bagels that morning and the grocery store was a complete zoo so we decided to see if any restaurants were still open that we could get carryout or even possibly delivery. We called the Thai restaurants around the corner, Bua Thai, and luckily they were both open and delivering.
We got an order of vegetable spring rolls, Phillip ordered tofu with mixed vegetables in peanut curry sauce, and I ordered Tofu with basil leaves, bamboo shoots, bell pepper and mushroom in hot chili sauce. The food was so good! We had gone to Bua once before and I was underwhelmed by what I ordered but both of the vegetarian dishes we got were delicious. My dish was great because it had the crunch of the bamboo shoots with the chewiness of the tofu so I did not have my problem with consistency I have come across so many times. It was a very pleasant surprise after our day of disappointing food a couple of weeks ago. We tipped a little extra too, since they delivered in a hurricane.

08.26.11_Butternut Squash Risotto


Similar to gnocchi, risotto is another one of those foods that has always scared me a bit to try. My avid Food Network watching has taught me it can easily come out wrong and after seeing Wolfgang Puck pull Jyll, a contest on Food Network Star back into the kitchen to show her how a risotto was properly made, I was skeptical to say the least. Since my audience was a little less daunting than Wolfgang Puck, I decided to give it a try. I found a Rachael Ray recipe for Butternut Squash Risotto and figured that her recipes are always super easy so this would be a good one to try. After reading over the recipe I decided I did not want to use the frozen butternut squash that it called for. While I'm sure it would be delicious, one of my biggest issues this month was consistency of food and everything being mushy. I thought about pureed butternut squash in the risotto and it immediately turned me off. I decided I would use fresh butternut squash instead and bump it up a little.

The hardest part of this dish was peeling the butternut squash. As I said while peeling the eggplant for the eggplant meatballs, my vegetable peeler is far from up to the task for something like a squash, so I just used a paring knife instead. It took a while just because I wanted to go slowly and not end up cutting myself. After peeling the squash, I cut it in half, took out the seeds, and then diced it up into small cubes. I tossed it with olive oil, S&P, and then put it in the oven for 25 minutes at 400 degrees per Ina Garten's suggestion.
While the squash was roasting, I made the risotto. Rachael's recipe was, as expected, easy to follow and straight forward. After cooking the onion and garlic for a few minutes, I toasted the arborio rice then added the cup of wine. After the wine completely cooked off, I added a few ladle-fulls of the stock and water mixture. I usually did three ladles each time. Other than having to be patient this was honestly one of the easiest dishes I've made this month. I was worried that my pan was not going to be big enough since I do not own a deep-sided skillet like Ray Ray has, so I just had to be careful at the end to stir slowly since the pan was filled to the brim. In the last couple of minutes, I added the butter, sage, and cheese before finally folding in the roasted butternut squash.

I could not get over how good this dish was, and how easy it was to make. I think I cooked it a few minutes too long since I was waiting for the garlic bread to come out of the oven, but other than that I was really impressed with how it came out. This recipe also made a ton of risotto so now we know: Rachael Ray's portion sizes: big. Giada DeLaurentiis's portion sizes: tiny.

08.25.11_Edamame Burgers


Last Monday, Food Network's Healthy Eats tweeted out a recipe for Edamame Burgers for #MeatlessMonday. I LOVE edamame so I looked at the recipe and thought it would be a fun Asian twist on the veggie burger. I also had not made any veggie burgers from scratch so I thought this would be a good recipe to try.

Looking through the recipe there were several ingredients that I had not worked with and quite frankly did not even know exactly what they were, aka millet and mirin. I assumed these things would be in the Asian section of the grocery store and if not, then I would figure it out. When we got to the international aisle we came across all the different Asian sauces and saw rice vinegars seasoned with mirin but not just mirin alone. I had rice wine vinegar at home so we decided not to buy any. As for the millet, we had Googled what it was but really had no idea where it would be in the store. I found one website that said a lot of organic grocery stores would have it in their bulk food section so I decided that Whole Foods would be the best place for this. I ended up finding millet flour but did not buy that either since it cost $6 for a bag and I only needed 1/4 of a cup and assumed I could use all-purpose flour.
Turns out, I was wrong about both of these things. While the rice wine vinegar is mirin seasoned, it is different from just mirin which is a rice wine, similar to sake. As for the millet, its actually a seed that you can cook, so I'm glad I did not buy the flour because that would have been completely wrong and a waste of money. Moral of the story, if there are ingredients you don't know, research them BEFORE you go to the store, not during or after. Just saying.

The patties before being sauteed.
On to the recipe. Since I did not have two of the correct ingredients I had to improvise. After reading how to cook the mirin and looking at pictures of what it looked like after being cooked, I decided to use couscous. It was something I had in the house and while it would not have the same flavor profile, I figured it would at least do the trick and we honestly wouldn't know the difference. I ended up using the rice wine vinegar since it was all I had and I knew it would still add some Asian flavor to the dish. Other than having to figure out what to do for those two things, everything was very straight forward and simple. I cut the recipe in half per usual since I did not need eight edamame burgers. The patties were easy to form and I let them set in the fridge for about 10 minutes so they would not fall apart when cooking them. I actually sauteed the burgers in a pan with a little oil rather than in the broiler  because I store all my pots and pans in my broiler and did not want to have to take them out. I was surprised how easily the burgers flipped and that they did not stick at all which was a pleasant surprise.

We served the burgers on toasted Pepperidge Farm Deli Flats rather than naan like the recipe recommended. I also topped my burger with a Kikkoman Terryaki Glaze that I love to add an extra layer of flavor. We served the burgers with vegetable pot-stickers we got at the store. My favorite part of ordering pot-stickers from a restaurant is the sauce that comes with it. These store bought ones did not come with any sauce so I decided I would make it rather than serve them with soy sauce. I found a recipe online and I had all the ingredients in the apartment already (except the scallion) so I quickly made this sauce. It was so good and tasted just like the one you get from any restaurant. Definitely a great addition to the pot-stickers. Also, we were surprised to learn that there was tofu in the vegetable pot-stickers we bought. I saw something white when I cut it in half and thought it might be cauliflower but after looking at the ingredients list found out it was tofu. I never would have guessed they would put tofu into vegetable dumplings. Fascinating.

08.24.11_Rooftop "Happy Hour"


This month we have been really good about trying to eat almost all of our meals at home and taking our lunches to work. We also have not gone to Happy Hour this month for a few reasons: 1) I've been excited to cook and if we do go to Happy Hour we end up getting food there and 2) It's hard to find vegetarian bar food unless they have nachos or mozzarella sticks or something. The weather has been so amazingly perfect the past couple of days so we decided to invite some of our friends over for drinks up on our roof and to do our own rooftop "Happy Hour." We figured this would be a lot cheaper than going to a bar and we got to do a smaller-scale tapas of our own!

I decided to make the Seven Layer Dip that my mom has made ever since I was a kid. It's one of those dishes that is so good to me because I associate it with my family, plus its so incredibly easy. They layers are:
  1. 2 cans of bean dip (I used refried beans this time because our Safeway did not have the Frito Bean Dip I wanted)
  2. 3 avocados mashed up with 2 Tbsp of lemon juice, S&P
  3. 1 a cup of sour cream, 1/2 cup mayo, and a package of taco seasoning mixed together
  4. 2 cans pitted black olives rinsed and diced (I just throw them in the food processor for a quick chop)
  5. 3 medium tomatoes diced
  6. 1 bag of Cheddar cheese
  7. 1 c. green onion on top for garnish 
It always looks so pretty if you serve it in a glass baking dish since you can see all seven of the layers. I ended up cutting the recipe in half since there were only four of us. I didn't have a small glass dish so it wasn't quite as pretty, but just as delicious.

Phillip made his favorite Bagel Dip. All it is is a package of cream cheese and a  small jar of Old English cheese mixed together and served with bagels ripped up for dipping. So delicious. We also bought Totino's Pizza Rolls. Our friend Amanda brought a block of cheddar cheese and Diana brought grapes and sweet potato fries. It was a great, relaxing evening and all the food was awesome. Clearly we were not going for healthy eats but after three weeks of being vegetarians, I think we were allowed to eat some less-than healthy food for a change.

08.23.11_Tofu Buffalo "Wings"


Phillip had found this recipe for Tofu Buffalo "Wings" and we thought it might be a good thing to try since we both love hot wings and obviously could not have them this month. I liked the idea of using the tofu differently since all we had done so far was make Asian dishes with it so I was interested to see how frying the tofu would go. Even though the recipe called for firm I bought the extra firm after having experimented with both. As always with working with the tofu, I pressed it to get as much water out as possible. The recipe said you could also freeze the tofu to get the chewier texture but I had not planned enough ahead for this and decided to just go ahead and make it anyway.

I was nervous that once I dropped the tofu into the hot oil it would just fall apart because it was starting to crumble a little just from cutting it. I also did not have a bag to shake the tofu in to fully coat with the corn starch and cayenne mix. I ended up just tossing each piece of tofu in the dry mix with my hands to make sure it was all coated. After dropping the tofu into the mix it felt much firmer and less likely to fall apart. I put about half the tofu into the oil and let it fry on one side for about two minutes or so. I was surprised how easily the tofu flipped over in the pan and that it did not stick at all. The first batch I did came out much crispier than the second. I think I was less patient with the second batch and the oil was also starting to spatter so I just wanted to be done with it.
The "wings" were pretty good. The crunchiest ones were definitely the best so if I were to make them again I would try to be patient and let them fry a little longer (I have a really hard time being in the kitchen but not doing anything). Also, as the recipe states you can easily make this meal vegan by subbing vegan margarine and ranch or make it healthier by baking the "wings" instead of frying them. In a dream world I would have a deep fryer for these bad boys because then they would have been delicious.

08.22.11_Gnocchi with Thyme Butter Sauce


Gnocchi is one of those things I've always wanted to try and make from scratch but have been to afraid to after watching years of Food Network and seeing how easily it can go from light fluffy pillows to dense pasty muck. I decided it was time to bite the bullet and since Phillip had only had it once before he probably wouldn't know the difference. I figured Giada would be the go to person on gnocchi and found her recipe for gnocchi with thyme butter sauce. I read through the recipe and was confused when I read, "Roll each piece of dough over a wooden paddle with ridges." I decided to Google "wooden paddle with ridges" and a gnocchi paddle came up. Of course there is such thing as a paddle specifically for scoring gnocchi. What was I thinking? The best part was if you clicked on Amazon's link for wooden paddle with ridges, Giada's cookbook comes up as another search result. Convenient.

Anyhow, I had also never made brown butter before and was nervous to try this because it can quickly go from brown to burnt. Luckily my obsessive checking on the butter paid off and I did not burn it. I was in for a surprise, however, when I added the thyme to the butter. I removed the melted butter from the heat like the recipe says to, added the thyme, and then what sounded like firecrackers erupted in my kitchen. I'm not sure if it was the water inside the thyme or what but it scared the crap out of me. I looked this up later to see if this was common and couldn't find anything so who knows. If you do decide to make this recipe, just be prepared for loud crackling when you add the thyme just in case!
The dough.
The dough after being scored.
Gnocchi prior to being cooked.
The finished product!
The dough was was easy to make and fun to play with. I couldn't believe how exact the recipe was (3 tablespoons of beaten egg, discard the rest). After rolling it out into the long, thin tubes, I scored the dough with a fork (since I didn't own a Gnocchi Paddle...shoot) and cut the dough into inch-long pieces. Cooking the pasta was easy enough as well, just drop into the water, wait for them to rise to the surface and then wait another four minutes. I put the gnocchi directly into the thyme butter sauce and this is where I had a bit of a problem. I wanted to toss the gnocchi in the sauce to make sure all sides had been coated with the sauce. They began to fall apart a little when tossing which frustrated me because they had looked so good before hand. Some reviews online seem to have had a similar problem and one reviewer claims that the recipe did not call for enough flour.

Besides the tossing of the gnocchi that did not go so well, I was very impressed with how easy the recipe was. The gnocchi tasted great and I enjoyed having a different sauce for them. One other side note is that this did not make very much. I'm not sure who Giada is feeding but there is no way that this is 4-6 servings. Phillip and I finished the entire pot of gnocchi in one seating on top of the salad and garlic bread I served it with, and I don't eat that much! So you may want to double this if you want leftovers or are making this for more than two people. Maybe that's why Giada is so tiny because she only eats six pieces of gnocchi for dinner.

08.21.11_Paneer Tikka Masala and Naan


Last weekend I had hoped on making Indian food but had forgotten a key ingredient, garam masala, at my Mom's house. We decided to make the vegetable curry instead since we had had our hopes up for Indian and it was much easier. Now that I had the garam masala, I wanted to try to make Tikka Masala. This is my favorite Indian dish that I almost always get when I eat Indian, but I decided to subsitute paneer, the Indian cheese, for the chicken. I also wanted to try and make my own naan. I had looked around on different websites and ended up finding a recipe on allrecipes.com that had good reviews and seemed simple enough.

I decided to cut the recipe in half because the original recipe made 14 servings. This was somewhat difficult because I had to use half of a beaten egg and half of a package of yeast but luckily my eye-balling did not mess up the recipe! I found that the comments on the recipe were extremely helpful. The recipe did not talk about "proofing" the yeast but multiple reviews said to add sugar to the yeast and warm water mixture. The yeast package also said to do this. After proofing the yeast, I just had to add in the rest of the ingredients (sugar, milk, egg, salt, and flour), knead the dough and then let it rise for an hour in an oiled bowl. I put the bowl into my oven since it was a warmer space. 
The dough after rising for one hour.
The dough divided into seven pieces.
Grilling the naan.
The finished product!
After the hour passed, I divided the dough into seven equal balls, put on a baking sheet, and let rise for another 30 minutes in the oven. Once that was done, all you had to do was flatten out the dough balls and throw on the grill. Another reviewer had mentioned that rather than kneading the garlic into the dough like the recipe called for, they added the garlic to the melted butter. I thought this sounded a lot easier and would also distribute the garlic more evenly so I went for that approach.  Once the naan was on the grill you just had to brush each side with the melted butter and garlic mixture, and grill on each side for a couple of minutes. I decide to make this earlier in the day so I would not be overwhelmed trying to grill naan while making Tikka Masal for the first time. I just tented the naan and kept it in my oven until we were ready to eat and they were still just as delicious! The recipe did not make a very flaky or bubbly naan but it still tasted good and apparently if you want the bubbles all you have to do is add a little baking soda to the mix!

After the naan was done it was time to move onto the Paneer Tikka Masala. I decided to use Aarti Sequeira's (the winner of Next Food Network Star a few seasons ago) recipe since she was my favorite that season and I had not made any of her recipes before. The only thing I changed was substituting the paneer for the chicken. Finding the paneer was definitely the hardest part of this recipe. I originally thought about making my own (Aarti had a recipe online) but I decided I was already making enough and did not want to end up having no cheese for the dish. We went to Wegman's since we were in Fredericksburg and I was sure they would have it since they have everything you could ever imagine. Sadly, they did not have paneer, or at least we couldn't find it. The guy at the cheese counter had never even heard of it. We did find multiple frozen and prepared dishes with paneer in it, but not just plain paneer. I then called this local market in DC that I thought might have it and they said they didn't either. Lucky for us Whole Foods did. It was a little pricey but it was definitely worth it.

Anyway, after marinating the paneer while I made the sauce, I sauteed it slightly while the tomatoes for the sauce were simmering. We poured the sauce into the blender, gave it a quick spin, then added the sauteed paneer to the sauce and let it cook for another 10 minutes. We served the Paneer Tikka Masala over basmati rice with the homemade naan I made earlier in the day. I was so excited that the sauce looked and smelled right that I forgot to put the cream in at the last minute. We did not even notice until I opened the fridge to put the leftovers in and saw the cream staring me in the face. The dish was still delicious without it so maybe leaving it out is an easy way to cut a few calories out of this dish! Overall a yummy and impressive Indian meal!

08.19.11_Tofuna


For some reason the only thing that I've really been craving this month is tuna fish. My coworker, Pascale, gets this tuna salad from a nearby lunch spot a lot and every time she got it I wanted tuna so bad. She jokingly joked that I could make tofuna. I decided to Google it and found multiple recipes! Phillip doesn't like tuna or anything that goes into it so I thought this would be a good thing to make for lunches for me.

The recipe was super simple. I had to freeze the tofu and defrost it first because it changes the consistency of the tofu.  After defrosting it, I pressed the tofu again and then squeezed out as much of the liquid as possible with my hands. I had never frozen tofu before so I was really surprised with how different the texture was after freezing and defrosting. It crumbled so easily. Then you just add the rest of the ingredients (lemon juice, soy sauce, celery, green onion, mayonnaise, S&P) and it's all done. The tofuna was...ok. I still am not a huge fan of tofu flavor and I could still taste some of it despite the lemon juice and soy sauce. It also didn't satisfy my craving. I always put mayo and relish in my tuna so I think if I had just subbed tofu for tuna and added my normal ingredients it may have been a better fix. Still an interesting idea though.
The crumbled tofu before adding any ingredients.
Another quick and easy lunch that we made was grilled cheese and tomato soup. I realize that this is not revolutionary or really worthy of blogging about but it was so good. During a month of trying almost nothing but new things, it was really great to have a dish that did not change at all now that we are vegetarians. I considered putting tomato on my grilled cheese to make it nicer but than I realized that what I was craving wast just a basic grilled cheese and Campbells canned tomato soup like I used to have as a kid. Sometimes something as easy as that can make all the difference if you are in a bit of a mid-month slump or have a couple of meals in a row that aren't quite as successful as you hoped.

Mmm. Grilled Cheese and Tomato Soup

08.18.11_Lebnese Taverna

Low quality picture of Manakish B`sbanigh, a Mediterranean Flatbread, taken on my iPhone in a dark restaurant.

I hadn't seen Caitlin since we made our "Sloppy Veg-Head Joes" a couple of weeks ago so we decided to meet in Tyson's Corner for dinner. Per usual, I let Caitlin consult her trust website, vegdc.com to find some vegan friendly options for her. She decided on Lebanese Taverna. I had been to the one in Baltimore one time before and enjoyed the food so I was excited to go again. The menu only had two vegetarian entrees, one of which was a special for the night, but featured a lot of vegetarian mezzas, or small plates. We decided to just order lots of mezzas and split everything rather than order entrees. Lots of people recommended this online in reviews even if you weren't vegetarian/vegan.

We got an order of falafel, Batata Meklieh (herb french fries seasoned with sumac, cumin, garlic puree), M`saka (oven roasted eggplant with chickpeas, tomatoes, onions, and garlic), Spicy Hummus, and Manakish B`sbanigh (a Mediterranean flatbread topped with spinach, onions, sumac, and pine nuts). Caitlin and I thought all the food was delicious (Phillip was content with his falafel, hummus, fries, and bread). If we had not ordered drinks we would have only spent $10/person so if you are looking for a cheap vegetarian dinner with friends give Lebanese Taverna a try. The entrees were priced in the upper teens so just ordering mezzas for the table seems to be a good money saving tip!

08.17.11_Polenta Pizza


Even before going vegetarian, I had added foodgawker to my RSS feed. I came across this post about polenta pizza and thought it would be a great idea for Caitlin since the recipe was vegan. Once we decided to drop meat for the month, I decided it would be a good idea to take the concept of the polenta crust and then top it however we wanted. I thought a margherita pizza would be easy enough so we decided to go for that.

I had never cooked polenta before so I was excited to try. Actually cooking the polenta was simple enough. Just add the box of polenta to a pot of boiling water and a few minutes later the polenta is nice and thick. Unfortunately this recipe for the pizza was much more difficult than it appeared on the blog that I found it on. She made it sound so easy: cook the polenta, spread it out, top it, and cook it. Sadly, it was quite the struggle to get the polenta to spread out. It was sticky and anytime I tried to smooth it out it would just stick to the spoon I was using. Finally I decided to spray nonstick cooking spray on the bottom of a measuring cup to help me flatten it out.  The blog post also didn't say how thick to make the crust so I had to eyeball it.
The pizza before going into the oven.
For the sauce I took a tomato that my mom had given me from her garden, diced it up and then mashed the tomatoes to make a "rustic" sauce to give a more homemade feel to some jarred sauce I already had. I also grated a clove of garlic into the sauce and seasoned it with oregano and S&P. After spreading the sauce out on top of the polenta, I added slices of fresh mozzarella, some basil leaves and sprinkled the whole pizza with Parmesan cheese.
The finished product.
We put the pizza in the oven at 350 degrees for 30 minutes. I was really nervous that the polenta was going to stick to the pizza pan but I had also sprayed that with nonstick cooking spray before hand and luckily it came off no problem. Our crust did not get very crispy unfortunately. I think the main problem was that I did not have a pizza stone like the recipe called for, which helps to make pizza crusts nice and crunchy. The flavors were still good and I still really like the concept of this dish. If I were to make it again without the pizza stone, I would consider baking the crust first before topping it to help it brown and get crispy.

08.16.11_Avocado and Arugula Pesto


As many of you know I finally caved and joined Twitter earlier this year after avoiding it for years. I just did not feel a need to constantly be telling people via multiple platforms what I was doing at this very second. Then Britney Spears started releasing information about her unreleased album via her Twitter account so I gave in and joined so I could get the newest info the minute it happened like a true fan. After realizing its potential I have come to really enjoy Twitter as a means to connect with people you would otherwise never be able to communicate with (aka celebrities). At the beginning of the month when I was scouring the internet for vegetarian recipes, Giada DeLaurentiis, one of the people I follow on Twitter, tweeted a recipe for Avocado and Arugula Pesto with Linguine. Since avocado is in my top 5 favorite foods and I love Giada this instantly intrigued me and I added it to the recipe list.

I loved that all this recipe required was a pot for boiling the water, a food processor, and an oven (for toasting almonds). There was no chopping or prep so it took minutes to prepare. After getting a pot on the stove for the pasta I preheated my toaster oven to 350 degrees. Since the recipe only calls for toasting 1/2 cup of almonds (personally I would have like a few more almonds) I did this in the toaster oven because it preheats so much faster than my oven. Once I put the pasta in I started the pesto. If you have a normal sized Cuisinart this will be much easier for you than it was for me using my baby Cuisinart. I had to put things in in batches to make it all fit: first the avocado, lime juice, garlic, and S&P. After that was all smooth I was able to add the arugula in small batches. In the end it somehow all fit!
I really liked this pasta. It was something different rather than the typical marinara or pesto like we made for our Eastern Market pasta nights. I thought the avocado taste was much more subtle than the arugula, though Phillip disagrees, so maybe it just depends on your palate. I think this pesto sauce would also be great for cold pasta salads or even just as a spread onto of crostinis. I ended up serving the pasta with a baguette we got from Panera (so good!) and mixed olive oil, red pepper flakes, cracked black pepper and a sprinkle of Parmesan cheese for dipping. Too bad I don't have any left over pesto sauce so I could try that crostini idea out with the leftover baguette.

08.15.11_Spinach Enchiladas

Spinach Enchiladas. This picture does not do these enchiladas justice for how delicious they were.

Since we hadn't had any Mexican food since our Bean Tacos, we decided to try this recipe for Spinach Enchiladas that Phillip found. I had not made enchiladas in probably four or five years so I was excited to make them again and the thought of spinach and cheese pouring out of a tortilla sounded incredible.

As almost all of the other recipes have been, this dish was super simple to prepare and involved very little cooking and/or prep work (my favorite kind of meal). The first thing to do was to defrost the frozen spinach. To go back and quote my favorite teacher Rachael Ray, frozen spinach truly is an incredible deal when you think about how much spinach wilts down after being cooked. While Ray Ray always used a dish towel to ring out all the liquid in the defrosted spinach ("She can afford to buy new towels each time" is how Phillip rationalized this gross technique) I decided to just use my hands and some paper towels to make sure all the liquid was gone.  Meanwhile, I sauteed some green onion and garlic for a couple of minutes in a tablespoon of butter before adding the spinach to the pan.

In a mixing bowl, I combined the ricotta and Monterrey Jack cheeses with the sour cream before adding the spinach mixture. After everything was combined, I used a 1/4 cup measuring cup to scoop out the spinach and cheese mixture into each tortilla. Using the 1/4 cup divided the enchilada filling perfectly, making the 10 tortillas stuffed evenly. The enchiladas were delicious, super satisfying, and ready in about 30 minutes. I served the enchiladas with some guacamole for a little something extra on the side.
The enchiladas after they came out of the oven, with an excessive amount of cheese melted on top!
The only modifications we made were using flour tortillas instead of corn (it's what I had in the house already) and I put way more cheese on top then the recipe called for. If you wanted to make this dish even healthier you could use olive oil instead of butter to saute the green onion and garlic, sub low fat cottage cheese instead of ricotta, and use corn tortillas (rather than flour) like the recipe calls for.

08.14.11_Vegetable Curry


My original plan for Sunday was to make homemade Indian food for the first time. My mom had bought some Garam Masala (a key ingredient I would need) and told me I could have some of hers because she had so much of it. I forgot to take some while we were out there on Friday so I decided to push back my plans of Paneer Tikka Masala for another week rather than buy my own huge thing of the spice. I still was craving Indian food and had found this recipe for Vegetable Curry that you made in the crock-pot. I thought this would be perfect since Phillip and I decided we wanted to go to the National Harbor for a bit.

I went to Safeway to buy all the ingredients and felt extremely healthy as I purchased nothing but vegetables and a can of coconut milk. Before this month, Phillip and I always looked at those people in the grocery store buying nothing but healthy things and were always so impressed. We are now those people. Anyway, this recipe could not have been simpler. While the onions were being sauteed, Phillip and I cut up all the other vegetables (carrots, zucchini, potatoes) and minced the garlic. I ended up buying frozen cauliflower (since we would not be using a whole head of it) and frozen green beans (since Safeway did not have fresh ones). After all the chopping was done, everything went into the crock-pot. 5 hours later, we had the most delicious curry ever. I served the curry over a bed of rice and bought some Naan from Whole Foods. A much better experience than our Saturday fail.
Side note: This recipe makes a TON of curry. After dinner and packing both of our lunches for the next day, there was still a huge Tupperware full of curry left. Nothing to complain about but you could definitely cut this recipe in half if you did not want leftovers for days. It didn't seem like much when I was reading the amounts of each vegetable but it barely all fit into my crock-pot.